
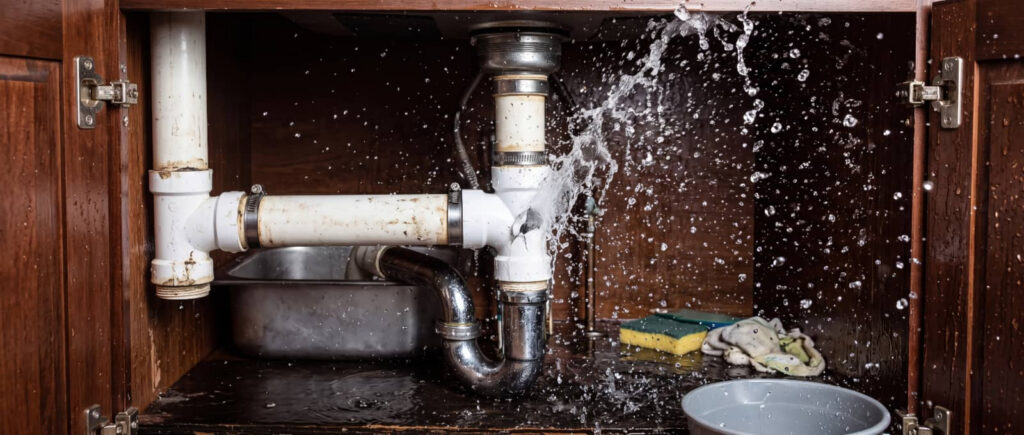
When a pipe has a little mishap, you need to act fast. The Burst Pipe Cleanup and Drying Process starts by shutting off the water and power, then removing standing water and damaged materials before moisture spreads deeper into walls and flooring. From there, you need to control airflow, reduce humidity, and check for hidden dampness before repairs begin. The cleanup may look simple at first, but the details can determine whether you avoid mold, structural damage, and repeat problems.
Key Takeaways
- Shut off water and power immediately, document damage, and wear protective gear before entering the wet area.
- Remove standing water fast with pumps or wet vacs, then discard unsalvageable drywall, insulation, and flooring.
- Dry the area with air movers and dehumidifiers, increasing airflow behind cabinets and inside hidden cavities.
- Sanitize affected surfaces with EPA-registered disinfectant, then repair damaged pipes, joints, walls, and floors.
- Prevent future bursts by insulating pipes, sealing drafts, checking pressure, and scheduling routine plumbing inspections.
What to Do Right After a Burst Pipe
If a pipe bursts, you need to act fast: shut off the main water supply, cut power to the affected area if water is near outlets or appliances, and move valuables out of the way.
Then you’ll assess the leak source and note how far water has traveled, because that helps your burst pipe cleanup and drying process stay efficient.
Open doors and windows only if conditions allow, and use fans or a dehumidifier to reduce humidity.
Remove standing water with towels or a wet vac if you have one.
Keep everyone clear of slippery surfaces and damaged wiring.
Document the damage with photos for your records.
Acting in order gives you control, protects your space, and helps your household recover faster together, with less disruption and more confidence.
Start Cleanup Safely
Now that you’ve stopped the water source and cleared immediate hazards, begin cleanup only when the area is safe to enter.
Before you move anything, put on gloves, boots, and eye protection, then confirm power is off in wet zones. Work methodically so you and your crew stay organized and protected.
Inspect floors, walls, and outlets for hidden risks.
Mark unstable areas so no one steps into them.
Open windows or run fans if ventilation is available.
Keep your path clear, use insulated tools, and avoid rushing into soaked spaces.
If you notice sagging ceilings, a gas smell, or live electrical concerns, back out and call qualified help.
Smart preparation lets your team act confidently and keeps the cleanup controlled.
Remove Standing Water and Damaged Materials
You’ll need to extract standing water quickly with a wet vacuum, pump, or extraction tool to limit seepage into subfloors and framing.
As you clear the area, separate undamaged items for salvage and remove any saturated debris, drywall, insulation, or flooring that won’t dry safely.
This step reduces moisture retention and prepares the structure for effective drying and repair.
Standing Water Extraction
Technicians remove standing water quickly to limit further saturation, mold growth, and structural damage. You’ll usually see truck-mounted vacuums, submersible pumps, and weighted extraction wands working in sequence to clear floors, subfloors, and cavities.
This step helps your cleanup team stabilize the site so drying can start on a controlled footing.
- Map the affected zones and verify water depth.
- Pump or vacuum out pooled water from hard surfaces.
- Lift saturated drywall, insulation, and carpet pad that can’t dry safely.
You’re not just watching water leave; you’re helping protect the structure your crew treats like home.
Once extraction finishes, technicians inspect for hidden pockets, check moisture levels, and prepare the area for targeted drying equipment.
Salvaging Undamaged Materials
Once crews remove standing water and damaged materials, they can quickly separate salvageable items from materials that need disposal. You should inspect each item for warping, staining, swelling, corrosion, or delamination, since these signs help you decide what can return to service.
Check framing, trim, baseboards, subflooring, cabinets, and contents with meters and visual inspection. If moisture readings stay within acceptable limits and surfaces remain structurally sound, you can protect them for further drying and cleaning.
Label approved materials, move them to a dry zone, and keep airflow around them. Working this way helps your team stay organized and confident, and it reduces avoidable loss.
When you document each decision, you also support a smoother restoration timeline and clearer communication among everyone involved.
Removing Saturated Debris
Before drying can begin, crews need to remove standing water and clear out saturated debris that can’t be restored. You’ll see technicians extract water with pumps and wet vacs, then sort materials by salvage potential.
Porous items like soaked carpet pad, warped baseboard, and swollen drywall usually come out fast to stop wicking and microbial growth.
- They bag and haul debris to keep pathways safe.
- They cut contaminated sections at clean, dry edges.
- They inspect hidden cavities for trapped moisture.
This step gives your restoration team a clean, measurable work zone. It also helps you protect the structure, reduce odors, and prepare surfaces for targeted drying.
When crews remove damaged materials early, you join a faster, more controlled recovery process.
Dry Walls, Floors, and Cabinets
Dry walls, floors, and cabinets with controlled airflow and dehumidification to stop moisture from spreading and to prevent warping, swelling, and mold growth.
Position air movers to push air across wet surfaces, not directly into cavities, and keep dehumidifiers sized for the space running continuously.
You should lift cabinet doors, remove toe kicks if needed, and expose hidden surfaces so drying reaches every damp area.
For floors, protect finished surfaces while you maintain steady circulation under and around them.
Check temperature and relative humidity often so you can keep conditions in the drying range.
Stay consistent, because uneven airflow slows recovery.
When you dry each surface thoroughly, you help your space return to safe, stable use and you protect the structure your household depends on.
Check for Hidden Moisture Before Repairs
Even after surfaces feel dry, you still need to check for trapped moisture before any repairs start. You’re part of a careful cleanup crew when you verify what your eyes can’t see. Use a moisture meter, probe seams, and inspect behind baseboards, under flooring, and inside cabinet voids. If readings stay high, pause repairs and keep drying equipment running.
Measure drywall, subflooring, and trim at several points.
Compare cool or damp spots with fully dried areas.
Open access points where water may have wicked upward.
Hidden moisture can weaken materials and cause repair failure, so confirm each area is within safe dry limits. When you test methodically, you protect the structure and stay aligned with the rest of the restoration team.
Sanitize Surfaces After Water Damage
Once standing water is gone and surfaces are dry enough to treat, you should sanitize all affected areas to reduce microbial growth and remove contamination left behind by the burst pipe.
Wear gloves, eye protection, and a mask before you mix an EPA-registered disinfectant at the label’s dilution rate. Apply it to hard, nonporous surfaces with a clean cloth, mop, or sprayer, then keep the surface wet for the full contact time.
Work from cleaner zones toward dirtier ones so you don’t spread residue. Rinse food-contact surfaces after disinfection if the product requires it.
Replace cloths often, and dispose of contaminated materials in sealed bags. By treating each surface carefully, you help your home feel safe, clean, and ready for the next stage of restoration.
Common Repairs After a Burst Pipe
After a burst pipe, you’ll often need to replace the damaged pipe section to restore full flow and prevent repeat leaks.
You should also repair compromised joints and seals, since even small gaps can keep releasing water under pressure.
Once the plumbing is stable, patch any damaged walls or floors so the area can dry properly and return to service.
Pipe Section Replacement
When a burst pipe compromises a damaged section, a plumber will usually cut out the failed material and replace it with new piping that matches the existing line in size and type. You’ll see the work move fast but stay methodical, so your system can return to service with confidence.
The replacement piece gets measured, cut, and fitted to restore the line’s original path and capacity.
- Isolate the damaged run.
- Remove the compromised section cleanly.
- Install the matching replacement and verify alignment.
This approach limits further disruption and helps you keep the rest of your plumbing intact.
After the new section is in place, you can expect the line to be restored for the next cleanup and drying steps, giving your home a dependable path forward and peace of mind.
Joint And Seal Repair
Even if the pipe section itself is sound, burst water can weaken nearby joints and seals, so a plumber will inspect every connection for cracks, loose fittings, and failed gaskets.
You’ll often need resealing, tightening, or replacing small components before the system can hold pressure again. Your technician may clean threads, apply approved pipe compound or tape, and reset compression fittings to restore a watertight bond.
If rubber gaskets have swelled, split, or hardened, they’ll swap them out with matched parts. This repair keeps leaks from returning after drying and pressure testing.
When you understand these steps, you’re part of the same careful process your restoration team follows: verify each joint, correct each weakness, and protect the plumbing so your home can recover safely and confidently.
Wall And Floor Patching
Once the plumbing checks out, the restoration team can start wall and floor patching to close up the damage left behind by the burst. You’ll see technicians remove softened drywall, warped trim, and loose subflooring, then square the openings for clean repairs. They match materials and thickness so the finished surface blends with the rest of your space.
Cut back damaged gypsum board to solid framing.
Replace soaked underlayment, plywood, or tile base.
Tape, mud, sand, and prime patched seams.
You can expect careful moisture checks before each step, because trapped dampness leads to swelling and mold.
The crew works to restore structural support, keep the area safe, and help your home feel like it belongs to you again.
Prevent Future Pipe Bursts
To help prevent future pipe bursts, inspect exposed plumbing for corrosion, leaks, or weak joints and address problems before winter arrives.
You should insulate pipes in unheated spaces, seal air leaks around walls and floors, and keep interior temperatures steady, especially during cold snaps.
Drain and shut off outdoor lines, then disconnect hoses and protect hose bibs with covers.
If your home has a pressure regulator, test it so water pressure stays within the manufacturer’s range.
You’ll also want to schedule routine plumbing checks after repairs, because restored systems can reveal hidden weaknesses.
When you stay proactive, you protect your home, reduce emergency costs, and keep your household safer.
That’s the kind of practical maintenance that helps your community stay resilient, connected, and ready for winter.
Frequently Asked Questions
How Long Does Insurance Usually Take to Approve Burst Pipe Claims?
Insurance usually approves burst pipe claims in 3 to 30 days, depending on documentation and adjuster workload. You’ll speed things up by submitting photos, repair estimates, and your policy details promptly.
Can Contaminated Water From a Burst Pipe Cause Mold Immediately?
Yes, contaminated water can trigger mold almost instantly, like a wildfire in your walls. You should remove moisture, disinfect surfaces, and dry materials within 24 to 48 hours to protect your home and your crew.
Will My Homeowners Policy Cover Temporary Hotel Stays?
Usually, yes—if your policy includes additional living expenses, you can claim hotel costs when a covered loss makes your home uninhabitable. You’ll need receipts, policy limits, and prompt notice to your insurer for approval.
How Can I Tell if Insulation Inside Walls Is Ruined?
You can tell insulation’s ruined if it feels soggy, smells musty, sags, or stains appear. Use a moisture meter behind wall openings; if readings stay elevated, you’ll need removal and replacement.
Do Burst Pipes Always Require Replacing Drywall?
No, you don’t always replace drywall; you can often dry, clean, and save it. If it’s swollen, crumbling, or mold-stained, remove it. You’ll protect your home, preserve comfort, and restore confidence fast.
Final Thoughts
In the end, you’ve got to treat a burst pipe like a fire in the bones: stop the source fast, clear the water, and dry every hidden pocket before mold can take root. You’ve sanitized the space, checked for trapped moisture, and handled the repairs that bring the system back to life. With regular inspections and insulated vulnerable lines, you can keep your plumbing running like a well-tuned engine, not a ticking leak.