

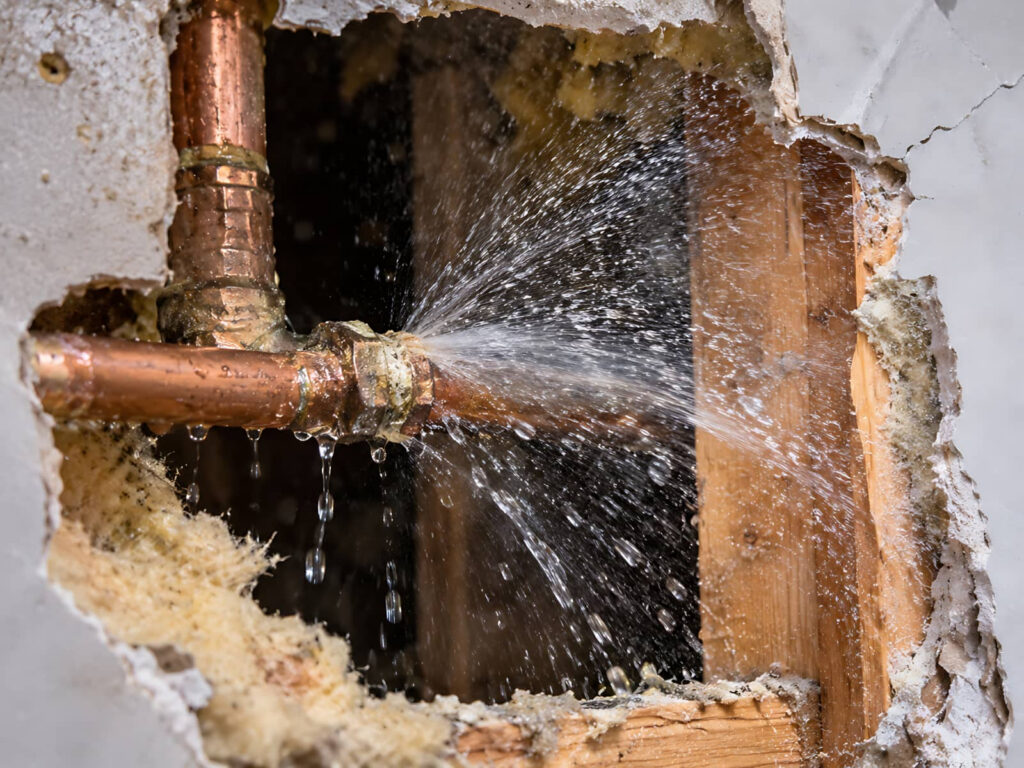
A burst pipe can quickly become more than a cleanup issue when it happens in a commercial property. Burst Pipe Cleanup for Commercial Properties should begin with shutting off the water, protecting assets, assessing the damage, and removing standing water as quickly as possible. From there, the affected areas can be dried, sanitized, and documented for insurance while keeping downtime to a minimum. The next steps can determine how quickly your business recovers and whether you avoid recurring damage.
Key Takeaways
- Shut off the main water supply immediately and isolate electrical systems in affected areas if it is safe to do so.
- Document all damage with photos and notes, and contact an emergency restoration team promptly.
- Remove standing water quickly using pumps and wet vacuums, then inspect hidden moisture in walls, flooring, and ceilings.
- Clean and sanitize contaminated surfaces with approved detergents and EPA-registered disinfectants, removing unsalvageable porous materials.
- Restore operations safely by verifying systems, managing insurance claims, and planning pipe insulation and inspections to prevent future bursts.
What to Do After a Burst Pipe
After a burst pipe, you need to act fast to limit water damage, protect equipment, and keep your commercial property operational.
You should document the affected areas with photos, then contact your emergency restoration team right away. Clear the space only if conditions are safe, and keep staff out of wet zones to reduce slip and electrical hazards.
Start burst pipe cleanup for commercial properties with a rapid inspection of flooring, walls, and contents so you can track moisture spread. Your crew should use professional drying tools, dehumidifiers, and extraction equipment to stabilize the site.
If you respond quickly and work with trusted specialists, you’ll restore control, protect your team, and reduce downtime while your business stays connected and supported.
Shut Off Water and Protect Assets
Shut off the main water supply immediately to stop the source of flooding, then isolate electrical systems in affected areas if it’s safe to do so. You’ll limit spread, reduce secondary damage, and keep your team aligned during a fast-moving event.
Move inventory, documents, and portable equipment away from wet zones, using carts or pallets to create separation. Cover remaining assets with waterproof tarps or plastic sheeting.
- Protect server racks first
- Elevate boxes and files
- Seal door gaps
- Clear floor drains
- Mark restricted areas
When you act quickly and methodically, you help your crew stay coordinated and protect the business community you’re part of. Document where valuables were relocated so your response team can work efficiently.
Check the Damage
You should assess all affected areas to determine the full scope of the burst pipe damage.
Check for hidden damage behind walls, under flooring, and in adjacent systems, since moisture can spread beyond visible surfaces.
Document every loss with photos and notes so you can support cleanup decisions and minimize downtime.
Assess Affected Areas
Where’s the water spread, and which materials took the hardest hit? You need to map every wet zone fast so your team can act with confidence.
Walk the space in sections, noting floor type, wall finish, inventory, and equipment exposure. Mark boundaries with tape or photos, and record moisture levels if you’ve got meters on hand. This quick assessment helps you prioritize cleanup, protect shared assets, and keep your operation moving.
- Hallways and entry points
- Storage racks and boxed goods
- Drywall, baseboards, and trim
- Carpet, tile, and raised flooring
- Electrical equipment and workstations
When you document the impact clearly, you create a common plan your crew can trust.
Identify Hidden Damage
After you map the visible water, check for hidden damage behind walls, under flooring, and above ceilings.
You’ll want to inspect insulation, framing, subflooring, and ceiling cavities for dampness, swelling, staining, or soft spots. Use a moisture meter to confirm elevated readings, and look for warped trim, loose baseboards, or bubbling finishes that signal trapped water.
Listen for dripping and feel for cold, damp surfaces near supply lines and penetrations. If you spot moldy odors or dark discoloration, treat the area as compromised.
Shut off nearby utilities if needed and keep traffic out of suspect zones. By staying methodical, you protect your team, reduce secondary losses, and keep the cleanup on track together.
Document Property Loss
Once hidden damage is mapped, document every affected area before cleanup begins. You’ll protect your claim and keep your team aligned when you record conditions now. Photograph walls, floors, ceilings, equipment, and inventory from multiple angles.
Note waterline heights, moisture readings, odors, and visible staining. Label each image with time, date, and location so your insurer can verify scope quickly. Keep damaged assets separate and list serial numbers where possible.
- Capture wide and close shots
- Log moisture meter results
- Record business interruption impacts
- Preserve receipts and vendor estimates
- Share one master file
Use this file to guide remediation, support reimbursement, and reduce downtime. When everyone works from the same record, your recovery stays organized and your property team feels prepared.
Remove Standing Water Fast
Pump out standing water immediately to limit structural damage, slip hazards, and moisture migration into walls, flooring, and equipment.
Use submersible pumps, wet vacuums, and extraction wands sized for the affected area, and route discharge to an approved drain. Prioritize low points, restrooms, mechanical rooms, and areas near load-bearing walls.
You should isolate power before working in flooded zones and keep traffic out until the surface is clear. Move portable assets only after documenting them, then place them in a dry staging area.
Check concealed spaces, floor drains, and under raised platforms so water doesn’t linger. When your team acts fast and works together, you protect operations, reduce claims, and keep your facility moving with confidence.
Dry and Dehumidify the Property
With the standing water removed, you need to dry the structure quickly and control humidity to stop secondary damage. You’ll protect your commercial space by moving air, pulling moisture from materials, and watching conditions until readings stabilize.
Use industrial equipment that fits the size of the loss and the layout of your property.
- Set up high-velocity air movers at wet surfaces.
- Run dehumidifiers continuously to lower indoor moisture.
- Monitor relative humidity and material moisture daily.
- Open access points to improve airflow between zones.
- Track progress so your team can restore operations faster.
Stay consistent, because hidden moisture can linger in walls, flooring, and framing.
When you dry the property well, you help your facility recover with less disruption and keep your crew confident in the process.
Clean and Sanitize Affected Areas
After the affected areas are dry, you should clean and sanitize all surfaces, equipment, and contents exposed to contaminated water.
Use approved detergents to remove visible soil, then apply an EPA-registered disinfectant at the correct dilution and contact time.
Focus on high-touch points, shared workstations, storage racks, and baseboards, since contaminants can linger there.
Remove porous items that can’t be fully restored, and clean salvageable materials with care to avoid cross-contamination.
Wear gloves, eye protection, and respiratory protection when needed.
Keep traffic out of the space until all surfaces are dry and safe for use.
When you follow a disciplined sanitation process, you help protect your team, support a healthier workplace, and get your facility back online with confidence.
Document Damage for Insurance
Document every visible sign of damage before cleanup or disposal begins, including water lines, warped materials, stained finishes, damaged equipment, and affected inventory.
You’ll strengthen your claim by creating a clear, time-stamped record that shows the incident’s scope and severity. Use photos, short videos, and written notes to capture each impacted zone from multiple angles.
Keep all files organized by room, system, and asset type so your insurer can verify losses quickly.
- Photograph close-ups and wide shots
- Note date, time, and location
- Record moisture readings if available
- List damaged assets with model numbers
- Preserve receipts and maintenance records
Share your documentation with your adjuster and team so everyone stays aligned and supported throughout the claim process.
Restore Operations Quickly
Once the cleanup phase is underway, you can restore critical operations by prioritizing safety, drying, and temporary continuity measures.
Verify that electrical systems, flooring, and work areas are safe before staff re-enter. Bring in dehumidifiers and air movers to finish moisture removal, then confirm readings with meters.
Set up temporary workstations, backup communications, and alternate storage so your team can keep serving clients while repairs finish.
Coordinate with vendors, IT, and building management to reopen the most important spaces first. Communicate clear access limits and expected timelines so everyone stays aligned and confident.
Keep a recovery checklist so you can reopen in stages without missing critical tasks. By sequencing work this way, you reduce downtime, maintain service, and help your crew stay focused and supported throughout restoration.
Prevent Future Pipe Bursts
You can reduce future burst risks by insulating vulnerable pipes in unconditioned or exposed areas.
You should also schedule regular inspections to catch corrosion, leaks, and pressure issues before they fail.
These measures help you protect your property and limit costly downtime.
Insulate Vulnerable Pipes
Insulate vulnerable pipes to lower the risk of future bursts, especially in areas exposed to cold air, exterior walls, or unheated mechanical spaces. You protect your building by wrapping lines with pipe insulation, foam sleeves, or heat tape rated for commercial use.
Focus on elbows, valves, and joints, where temperature loss happens fastest. Keep materials snug, continuous, and dry so they perform well under stress. When you insulate consistently, you support your team’s operations and reduce costly interruptions.
- Seal gaps around pipe penetrations
- Cover exposed metal and plastic lines
- Match insulation thickness to risk
- Protect fittings with molded pieces
- Secure coverings against moisture and damage
Schedule Regular Inspections
Schedule regular inspections to catch small leaks, corrosion, damaged insulation, and pressure issues before they turn into burst pipes. You should inspect exposed lines, valves, joints, and fixtures on a set schedule, then document every finding so your team can track trends and act fast.
In commercial properties, early detection helps you protect tenants, equipment, and operations while limiting cleanup costs and downtime. Use qualified plumbers or facility staff to test water pressure, check for condensation, and verify that drains and shutoff valves work properly.
If you spot discoloration, damp spots, or unusual sounds, address them immediately. When your building team stays proactive, you create a safer, more reliable environment that keeps everyone confident, connected, and prepared.
Frequently Asked Questions
How Long Does Commercial Burst Pipe Cleanup Usually Take?
You’re usually looking at 1-3 days for commercial burst pipe cleanup, though you may need longer if water’s spread widely, materials are saturated, or drying, sanitizing, and repairs require specialized equipment and staffing.
Can Business Operations Continue During Burst Pipe Restoration?
Yes, you can often keep operations running if you isolate affected areas, manage moisture, and set up temporary controls. You’ll need coordinated cleanup, safety checks, and flexible access to reduce disruption and protect your team.
Does Insurance Cover Mold Caused by Burst Pipe Water Damage?
Usually, yes, if you report the damage quickly and the mold stems from a sudden burst pipe. You’ll need policy review, documented mitigation, and prompt remediation; otherwise, coverage can drift away like smoke.
What Permits Are Needed for Commercial Water Damage Repairs?
You’ll usually need building, plumbing, electrical, and demolition permits, plus fire or health department approvals if systems or sanitation are affected. Check local codes first, then pull permits before you start repairs.
How Can Managers Verify the Building Is Fully Safe Afterward?
You verify safety by inspecting moisture, testing air quality, and confirming electrical systems. Many water-damaged buildings develop hidden issues, so you should document readings, then clear occupancy only after certified signoff.
Recap
When a pipe bursts, you need to act fast, stay organized, and protect both your property and operations. Shut off the water, remove standing water, dry affected areas, and sanitize thoroughly to stop damage from spreading. Document everything for your claim, then restore systems with care. Think of quick response as a firewall against chaos. With regular inspections and pipe insulation, you can reduce future risk and keep your facility running smoothly.