
If your basement floods, you need to act fast and stay safe. First, cut power if water may have reached outlets or equipment, then stop the source if you can. Next, remove standing water, wet materials, and damaged items before drying the space with fans and dehumidifiers. Cleaning and disinfecting come after that, but some materials won’t be worth saving. The real challenge is knowing what to tackle yourself and when the cleanup gets bigger than expected.
Key Takeaways
- Shut off power if safe, stop the water source, and evacuate people, pets, and valuables from the basement.
- Check for gas odors, structural damage, and electrical hazards before entering; wear boots, gloves, and eye protection.
- Remove standing water with pumps or wet vacs, then discard soaked porous materials like carpet, insulation, and drywall.
- Dry and clean the space with fans, dehumidifiers, detergent, and disinfectant until the humidity stays below 60%.
- Call flood cleanup professionals for sewage, chemicals, or deep flooding, and expect longer cleanup with more water and poor drying conditions.
What to Do Right After Basement Flooding?
Right after basement flooding, act quickly but safely: shut off electricity to the affected area if you can do so without entering standing water, stop the water source if possible, and move people, pets, and valuable items out of the basement.
You’re not alone in this moment; follow a calm, stepwise basement flooding cleanup process. Open windows if weather allows, and document the damage with photos for insurance before you move or discard anything.
Wear protective gear if you must enter the space later, and keep children and pets away until conditions improve. Remove only loose items you can reach safely, then contact your insurer and a qualified restoration team.
Their guidance helps you protect the structure, reduce secondary damage, and start recovery with confidence.
Stop the Water and Check for Hazards
First, stop the water at its source if you can do so safely, and shut off power to the basement only if you can reach the breaker without stepping into standing water.
Then look for immediate hazards: gas odors, sagging ceilings, cracked walls, loose outlets, and sharp debris. If you smell gas, leave at once and call the utility company.
Wear rubber boots and gloves, and avoid metal tools near energized fixtures. Keep children and pets out of the area so you can work without distraction.
If the water came from sewage, assume contamination and keep skin contact minimal. Document what you see with photos from a safe distance.
If anything feels unstable, wait for a qualified professional. You’re not handling this alone; careful assessment now helps your cleanup go smoothly.
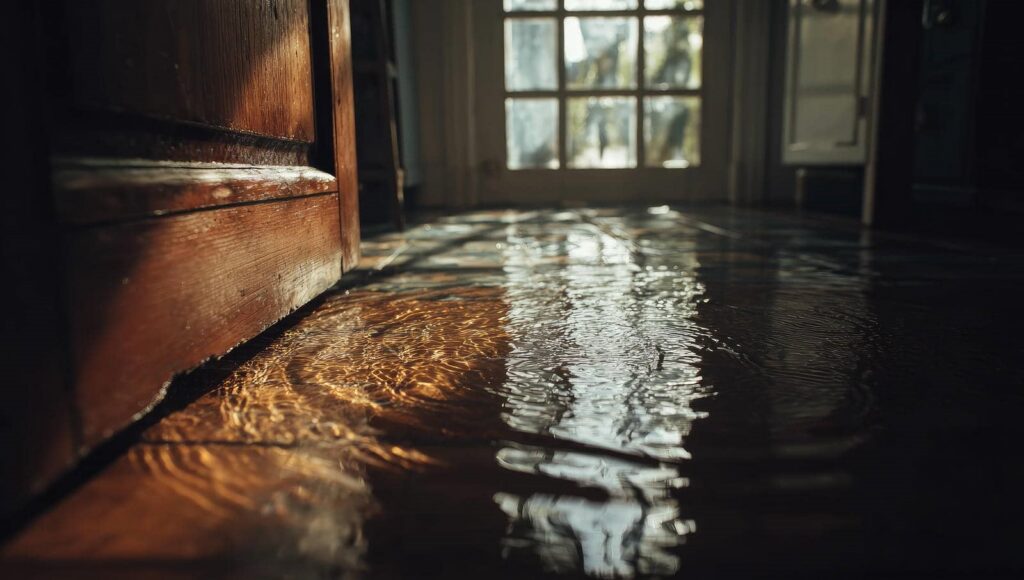
Remove Standing Water and Wet Materials
Begin removing the water as soon as the area is safe, using a pump, wet/dry vacuum, or buckets for shallow pooling.
Work from the lowest point outward so you don’t trap water behind debris or furniture. If you can, lift items onto blocks before you move them, and take photos for your records.
Remove wet carpet, padding, cardboard, insulation, and any porous material that soaked up dirty water, because these items can hold contaminants and undermine cleanup.
Bag smaller items right away and stack salvageable belongings in a clean, dry spot.
Wear gloves and sturdy boots, and keep a clear path so you can work efficiently.
You’re not doing this alone; steady, careful removal sets the stage for a safer recovery and helps your basement get back to normal sooner.
Dry Out the Basement
After you remove standing water, keep checking for hidden moisture in corners, under flooring, and along walls.
You’ll want to run fans, open windows if weather allows, and use dehumidifiers to increase air circulation and speed evaporation.
Drying the basement quickly helps limit mold growth, protect materials, and move you closer to a safe recovery.
Remove Standing Water
Stand in the water and moisture quickly before damage spreads further. You’ll want to remove standing water as soon as it’s safe, because every minute can worsen flooring, drywall, and framing.
Use a submersible pump for deep water, then switch to a wet/dry vacuum for the last inches. If the source is contaminated or the water is near electrical hazards, shut off power and call a professional.
Stay organized and work in sections so you don’t miss hidden pockets.
- Pump out bulk water first.
- Vacuum remaining puddles and seepage.
- Check corners, closets, and under stored items.
You’re not alone in this process; a methodical approach helps you regain control and protects your basement from further damage.
Increase Air Circulation
Once the water’s gone, you need to move air through the basement fast to drive out lingering moisture and slow mold growth. Open windows and doors if outdoor air is dry, then set up box fans to create cross-ventilation.
Aim airflow across damp floors, walls, and corners where water hides. If you’ve got a dehumidifier, run it continuously and empty the tank as needed, or connect a drain hose.
Keep HVAC returns closed if ducts got wet. Lift wet materials off the floor so air can reach both sides.
Check humidity with a meter; keep it below 60% if you can. Stay patient and consistent, because a properly dried basement protects your home, your health, and your peace of mind.
Clean and Disinfect Flooded Surfaces
Start by scrubbing all flooded surfaces with hot water and a heavy-duty detergent to remove mud, silt, and residue before disinfecting. You’ll get better results when you work in sections and rinse each area well.
Use a pump sprayer, mop, or sponge to apply a disinfectant labeled for flood cleanup, and follow the contact time on the product directions. Wear gloves and eye protection so you can clean with confidence.
- Remove visible debris first.
- Wash, then disinfect every affected surface.
- Let surfaces air-dry after treatment.
Pay close attention to walls, floors, baseboards, and built-in storage. If you’re tackling this alone, keep your pace steady and check your progress often.
A careful cleanup helps you move forward with the rest of the restoration process.
Prevent Mold Growth After Flooding
Even after the visible water is gone, mold can begin growing within 24 to 48 hours, so you need to dry the basement quickly and completely.
Run fans and dehumidifiers nonstop, and open windows only if the outside air is dry. Remove wet drywall, carpet padding, and insulation that stay damp.
Check behind baseboards, under stairs, and inside closets where moisture hides. Keep indoor humidity below 60% with a hygrometer, and empty dehumidifier tanks often.
Clean remaining hard surfaces with detergent, then disinfect and let them dry fully. Watch for musty odors, discoloration, or fuzzy spots, and address them right away.
If the space feels overwhelming, you’re not alone; steady, methodical drying protects your home and helps your basement recover safely.
Save What Can Be Restored Safely
You can save items that pass a salvageable item assessment, but only if they’re structurally sound and free of hazardous contamination.
Clean restorable materials with safe methods matched to the material type, then dry them fully to prevent further damage.
Discard anything porous, severely soaked, or contaminated with sewage, chemicals, or heavy mold.
Salvageable Item Assessment
Before discarding anything, sort basement contents by what you can safely clean and restore versus what you can’t.
You’ll make faster, smarter decisions when you separate items by material, saturation time, and contamination risk. If you’re part of a household or team, assign one person to tag items and keep a simple inventory so nothing gets lost in the shuffle.
Keep: solid wood, metal, glass, and sealed hard goods with limited exposure.
Review: upholstered furniture, books, electronics, and laminated items for damage extent.
Discard: porous materials that stayed soaked, warped, or show visible mold growth.
Trust your judgment, but don’t force salvage when structural integrity, odor, or contamination make an item unsafe to keep.
Safe Cleaning Methods
Start cleaning only after you’ve confirmed the area is safe, dry enough to work in, and free of electrical hazards; then use the least aggressive method that can fully remove dirt, silt, and contamination.
You’ll usually begin with vacuuming or dry brushing loose debris, then move to wiping hard surfaces with clean water and a mild detergent. Rinse cloths often so you’re not spreading residue.
For nonporous items, a low-pressure rinse and disinfectant may help, but follow product labels and allow full contact time.
Work from the cleanest areas toward the dirtiest so you keep control of the job.
Wear gloves, boots, and eye protection, and change water when it turns cloudy.
This steady approach helps your space recover without unnecessary damage, and you’re not doing it alone.
Discard Contaminated Materials
After cleaning loose debris and washing salvageable surfaces, sort the remaining items by what can be safely restored and what needs to go. You’ll protect your home best by separating porous materials, electronics, and heavily soaked items from hard, nonporous objects.
When in doubt, discard anything that smells musty, shows mold, or stayed wet too long. Work as a team and keep the safe pieces together so your space feels manageable again.
- Bag and remove drywall, insulation, carpet, and padding.
- Set aside metal, glass, and sealed plastic for disinfection.
- Photograph damaged items before disposal for records.
Wear gloves, boots, and a respirator while you handle waste.
Then arrange pickup or haul materials to an approved site, and you’ll move one step closer to a clean, secure basement.
When to Call Flood Cleanup Pros
When should you call flood cleanup pros? Call them as soon as you notice sewage, chemical odors, or water that’s been standing long enough to seep into walls or flooring.
You should also reach out if the flood came from a broken pipe inside a wall, if you can’t identify the source, or if electrical systems may be wet.
Pros bring moisture meters, extraction equipment, and containment methods that reduce hidden damage and mold risk.
If the space feels unsafe, trust that instinct; you’re not overreacting.
Getting expert help doesn’t mean you’ve failed. It means you’re protecting your home and your household with the right team.
A qualified crew can assess damage, guide next steps, and help you move forward with confidence.
How Long Basement Flood Cleanup Takes
How long your basement flood cleanup takes depends first on water depth, since deeper flooding usually needs more extraction and more drying.
You’ll also see the timeline shift based on drying conditions like humidity, airflow, and material type, which affect how quickly moisture leaves the space.
If repairs are needed, the scope can add time, but a clear cleanup plan helps you track each step and restore the area safely.
Water Depth Impact
The deeper the water, the longer basement flood cleanup usually takes because crews must remove more volume, dry more materials, and check for hidden moisture.
If you’ve got just an inch or two, you’re usually looking at faster extraction and inspection. Several inches can push the job into a longer, more detailed process, especially if water has reached walls, stored items, or utilities.
You’re not dealing with this alone, and a good team will explain each step clearly.
- Shallow water: quicker removal, less surface damage
- Moderate depth: more extraction and material checks
- Deep flooding: slower cleanup, broader inspection, more labor
With the right crew, you’ll know what’s happening and why, so you can stay confident through cleanup.
Drying Time Factors
Drying time depends on more than just the amount of water, because materials, airflow, humidity, and temperature all affect how fast a basement dries.
You’ll usually see quicker results when you remove standing water fast and use dehumidifiers, air movers, and heat in a balanced way.
Porous materials like carpet, drywall, and insulation hold moisture longer than concrete, so your timeline can vary.
If outside air is humid, drying slows; if the air stays warm and moving, it speeds up.
You can help by keeping doors open when advised and avoiding anything that traps moisture.
A professional moisture check shows whether hidden areas are still damp.
With steady equipment and good conditions, you’ll know you’re moving toward a safe, dry basement.
Repair Scope Timeline
After the moisture starts dropping, the next question is usually how much repair work your basement actually needs. Your timeline depends on the damage category, material saturation, and whether you need structural or finish repairs.
In a typical cleanup, you can expect:
- 1–3 days: extraction, drying, and humidity monitoring.
- 3–7 days: removal of damaged drywall, insulation, and flooring.
- 1–3 weeks: repairs, sanitation, and final checks.
If water reached electrical systems, framing, or mold-prone cavities, your project may run longer.
You’ll move faster when you document damage, approve scopes quickly, and keep equipment running continuously.
You’re not dealing with this alone; a steady, organized process helps your basement get back to safe, usable condition with fewer surprises.
How to Prevent the Next Flood
To keep another basement flood from catching you off guard, inspect and maintain the systems that protect your home before the next storm hits.
Check sump pumps monthly, test backup batteries, and clear debris from discharge lines so water can move away fast.
Seal wall cracks, patch floor joints, and confirm downspouts extend well beyond the foundation.
Grade soil to slope outward, and clean gutters before heavy rain.
If you live in a flood-prone area, add a backwater valve and consider a water alarm for early warning.
After each storm, walk the basement with your crew, note damp spots, and fix small issues before they grow.
With steady upkeep, you’ll protect your space and stay ready together.
Wrap-Up
You can tackle basement flooding cleanup with steady, smart steps: stop the water, stay safe, pump out standing water, dry every damp surface, and disinfect thoroughly. You’ll also need to sort salvageable items from ruined ones and know when to call pros. Expect the process to take time, depending on water depth and drying conditions. With careful, consistent action and preventive planning, you’ll restore your space and reduce the risk of repeat flooding.