
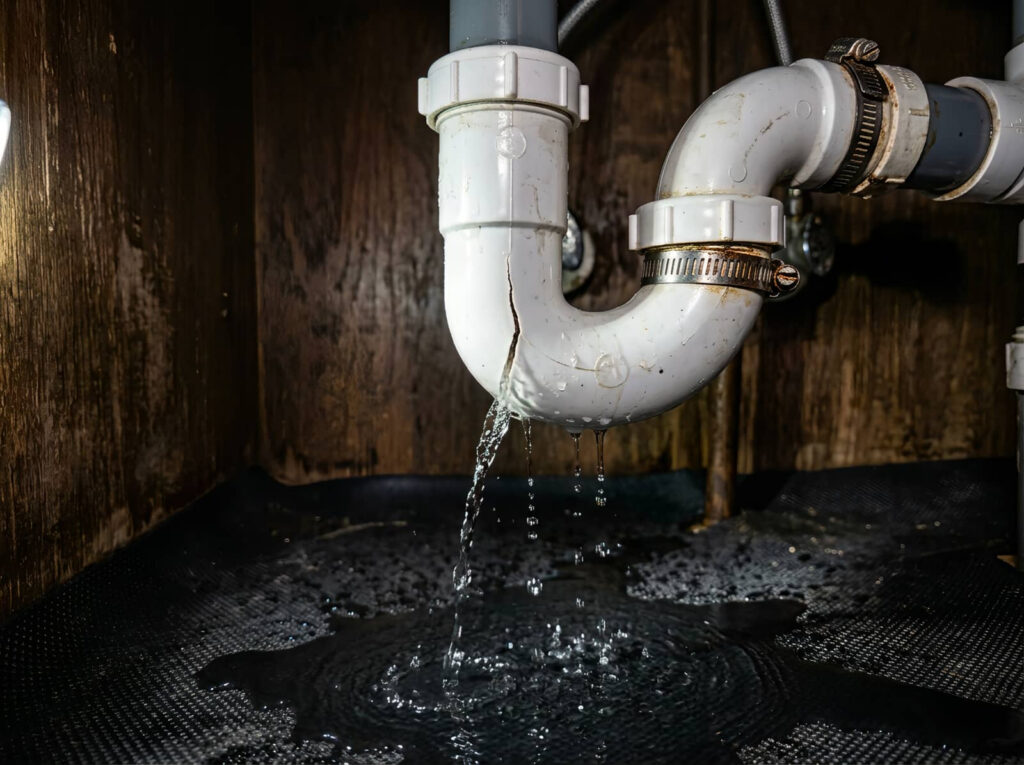
A burst pipe can turn a quiet home into a fast-moving cleanup job, but the right first steps can help limit the damage. Burst Pipe Water Damage Cleanup should begin by shutting off the water and power, assessing the affected areas, moving wet items, and documenting the damage for your claim. From there, water removal, cleaning, and mold control become critical. Knowing when to call a professional can make all the difference.
Key Takeaways
- Shut off the main water supply and cut power if water is near outlets or appliances.
- Inspect and document damage, including hidden saturation, with photos and notes.
- Move furniture, rugs, and other wet belongings to a dry, ventilated area.
- Extract standing water quickly, then clean and disinfect affected surfaces safely.
- Monitor for mold within 24 to 48 hours and call professionals for extensive damage.
Shut Off Water and Power First
Before you do anything else, shut off the main water supply to stop more water from flooding the area.
Then cut power to the affected zone at the breaker if water’s near outlets, fixtures, or appliances. You’re protecting yourself and everyone who shares the space.
These burst pipe water damage cleanup steps help you regain control quickly and reduce the chance of electrical shock, fire, and further plumbing strain.
If you can do so safely, confirm the pipe’s leak source and keep clear of standing water until utilities are isolated.
Stay calm, move with purpose, and treat this as a team effort.
Once water and power are off, you’re ready for the next cleanup stage with confidence and a safer environment.
Check the Damage Right Away
With the water and power secured, check the damage right away so you can understand how far the leak has spread.
Walk through the affected area and note where water has pooled, seeped, or traveled behind walls, under flooring, or into ceilings.
Look for staining, swelling, peeling paint, and soft spots that signal hidden saturation.
Use a flashlight to inspect dark corners, baseboards, and lower cabinet areas.
If you see active dripping or bulging materials, treat those spots as urgent.
Take photos and short notes so you can track conditions and share clear details with your restoration team or insurer.
You’re not facing this alone; careful observation now gives you control, helps limit hidden damage, and sets up the next cleanup steps with confidence and accuracy.
Move Furniture and Dry Items
You should move furniture out of the affected area right away to limit moisture exposure and prevent staining or warping.
Remove wet fabrics, rugs, and cushions so they can dry separately and won’t hold water against floors or walls.
Salvage dry items immediately by placing them in a clean, dry space before secondary damage sets in.
Move Furniture Quickly
Act quickly to move furniture and other portable items out of the wet area, starting with pieces that sit directly on saturated flooring or carpet.
You should protect the structure and make recovery easier by clearing pathways first, then lifting items with a teammate to avoid injury. If a piece is too heavy, slide it on a dry board or furniture glider rather than dragging it across wet surfaces.
Place belongings in a clean, dry room with good airflow, keeping them spaced apart so moisture doesn’t linger. Remove cushions, electronics, and loose accessories you can safely separate, and set them on elevated surfaces.
Your fast, coordinated response helps limit staining, warping, and secondary damage. You’re not handling this alone; acting as a team gives everyone a better outcome.
Remove Wet Fabrics
Strip out wet fabrics next, including rugs, curtains, bedding, throw blankets, and removable upholstery covers, because porous materials hold water and can spread moisture to nearby surfaces.
Move them out of the affected room and place them in a dry, ventilated area so air can circulate around each item. If you can lift them safely, keep them away from walls and floors to reduce secondary staining and mildew risk.
- Keep items separated, not stacked.
- Don’t drag soaked textiles across clean flooring.
- Remove heavy pieces with care to avoid strain.
As you work, wear gloves and stay mindful of slippery floors.
If your space feels overwhelming, take it one section at a time; you’re handling the right steps, and steady action now helps protect your home and your team’s progress.
Salvage Dry Items
Once wet fabrics are out of the way, focus on salvaging dry items by moving furniture, boxes, electronics, and other unaffected belongings to a safe, dry area.
You’ll reduce secondary damage, improve airflow, and make cleanup safer for everyone in your home or business.
Lift items instead of dragging them, since dragging can spread moisture and scratch flooring. If something is too heavy, ask for help and use proper lifting tools.
Keep dry belongings grouped together so you can inspect them later for hidden dampness or contamination. For electronics, unplug them first and place them where they can dry fully.
Clear pathways as you work, and avoid stacking items against walls. Acting quickly helps your space recover faster and keeps your restoration team’s work efficient.
Take Photos for Your Insurance Claim
You should photograph all visible damage right away, including walls, floors, ceilings, and any affected belongings.
Take close-up shots that clearly show water lines, stains, warped materials, and other specific evidence of the burst pipe’s impact.
These images can help support your insurance claim and give you a clear record of the damage before cleanup continues.
Document Visible Damage
Start documenting the damage as soon as it’s safe to enter the affected area, because clear photos can support your insurance claim and help verify the extent of the loss. You should record every visible sign of water intrusion so your claim reflects the full scope of damage.
Photograph wet floors, stained walls, warped trim, and damaged belongings from several angles. Keep your phone or camera steady and capture the scene in good light. Include wide shots that show room conditions and the source area in relation to surrounding spaces.
- Note the date and time on each image
- Keep a simple log of affected rooms
- Save original files without edits
This organized record helps you stay prepared, communicate clearly with adjusters, and feel confident during recovery.
Capture Close-Up Evidence
After capturing the overall scene, move in for close-up photos that show exactly how the water affected specific materials and belongings.
Focus on soaked drywall, warped baseboards, stained insulation, damaged flooring, and any electronics, furniture, or documents that got wet. Include serial numbers, labels, and manufacturer tags when you can.
Use good lighting and take shots from several angles so the damage is unmistakable. Place a common object, like a ruler or coin, near cracks, stains, or debris to show scale.
Don’t move items before you photograph them unless they create a safety risk. If you’re part of a household or team, assign one person to shoot and another to note times.
These details strengthen your insurance claim and help your restoration crew work with confidence.
Remove Standing Water
Use a wet/dry vacuum, mop, towels, or a pump to remove standing water as quickly as possible, since pooled water can keep soaking into floors, baseboards, and subflooring.
Move methodically so you don’t miss low spots, corners, or edges near cabinets. If the water is deep, shut off power to affected areas first and work safely with proper gear.
Empty containers and relocate dry belongings to keep your path clear.
Start at the lowest point so water flows toward your tools.
Check for recurring seepage and keep extracting until the surface stays still.
You’re not just cleaning up a mess—you’re limiting damage and taking control.
Fast extraction helps you protect your home, reduce repair costs, and stay on track with the rest of the cleanup.
Dry Walls, Floors, and Hidden Spaces
Once you’ve removed standing water, move quickly to dry walls, floors, and hidden spaces before moisture settles deeper into the structure.
You should run dehumidifiers and high-velocity fans to push air across wet surfaces and into corners where trapped moisture lingers.
Pull back baseboards, open cabinet doors, and lift rugs so airflow reaches concealed areas. If you can safely do so, create small gaps at the bottom of wall cavities to help moisture escape.
Check flooring edges, insulation, and behind furniture with a moisture meter, because damp materials can stay wet long after the surface looks dry.
Stay alert for cool spots, soft drywall, or warped trim, and keep drying until readings stabilize.
Acting now helps protect your home and keeps your cleanup team on track.
Clean and Disinfect Affected Surfaces
Next, you should clean all affected surfaces with a detergent solution to remove dirt, residue, and any visible contamination.
After cleaning, apply an appropriate disinfectant according to the label directions so you can reduce the risk of microbial growth.
Keep the area ventilated, wear protective gloves, and let surfaces dry fully before you use the space again.
Surface Cleaning Steps
After the area dries, you should clean and disinfect all affected surfaces to remove residue, reduce contamination, and prevent lingering moisture from causing further damage.
Start with hard surfaces, then move to trim, cabinets, and exposed framing. Use a clean microfiber cloth, a mild detergent solution, and fresh water to lift dirt without pushing it deeper. Rinse, then dry each section completely before moving on.
- Wipe from top to bottom to keep debris from resettling.
- Change cloths often so you’re not spreading grime.
- Inspect seams and corners where buildup often hides.
If you stay methodical, you’ll restore a cleaner, safer space and support the rest of your cleanup plan.
Your home deserves that same steady care you’d want for any trusted place.
Disinfection And Safety
With the visible residue removed, you should disinfect all affected surfaces to help control contaminants and reduce the risk of lingering moisture-related problems.
Wear gloves, eye protection, and a mask before you mix or apply any sanitizer. Use a disinfectant approved for flood or water-damage cleanup, and follow the label’s dilution and contact-time instructions exactly.
Work from clean areas toward dirtier ones so you don’t spread bacteria or mold spores back into the space. Pay close attention to baseboards, floors, trim, and any item that stayed damp.
If a surface can’t be fully cleaned, it may need removal and replacement. Keep the area ventilated, and never mix chemicals.
When you follow these steps, you protect your home and help your household return with confidence.
Watch for Mold Growth
Even if the visible water is gone, mold can start developing within 24 to 48 hours after a burst pipe, so you need to monitor damp areas closely. Check baseboards, drywall, insulation, and hidden corners for discoloration, musty odors, or fuzzy patches.
You’ll protect your space best when you act quickly and stay consistent.
- Inspect daily for dark spots or peeling paint
- Feel for cool, damp surfaces after cleanup
- Watch for worsening odors in closed rooms
If you spot growth, keep the area dry and separate from clean living spaces. Don’t ignore small signs; mold spreads fast in shared environments and can affect everyone’s comfort.
With careful observation, you can catch problems early and keep your home healthier for everyone inside.
Call Water Damage Pros When Needed
If you notice mold, soaked drywall, warped flooring, or water that’s reached walls, ceilings, or electrical areas, it’s time to call a water damage professional.
You don’t have to manage every repair alone, and you’re not overreacting by asking for help. Pros use moisture meters, thermal imaging, and industrial extraction equipment to find hidden damage fast.
They can dry structural materials, document losses for insurance, and reduce the chance of trapped moisture lingering behind finishes.
When you bring in a qualified team, you protect your home and join other owners who act decisively under pressure.
Call right away if the water is contaminated, the damage is widespread, or you can’t safely access the affected area.
Quick professional support can make the cleanup more controlled and less stressful.
Prevent Future Pipe Bursts
After the cleanup, take steps to reduce the chance of another burst by insulating exposed pipes, sealing air leaks near plumbing, and keeping indoor temperatures steady during cold weather.
You should also let faucets drip during hard freezes, so pressure won’t build in vulnerable lines. Inspect hoses, shutoff valves, and pipe joints for corrosion, then replace worn parts before they fail.
If you live in a shared building, coordinate with maintenance so your unit stays protected too.
- Wrap basement and attic piping
- Disconnect outdoor hoses before winter
- Schedule annual plumbing inspections
These habits help you stay ahead of water damage and protect the home you belong in.
When you build a prevention routine, you’re not just maintaining plumbing—you’re safeguarding comfort, safety, and peace of mind for everyone under your roof.
Frequently Asked Questions
How Do I Know if My Insurance Covers Burst Pipe Damage?
Check your policy’s dwelling and water-damage sections, then call your insurer. You’ll usually qualify if the pipe burst suddenly, not from neglect. Ask about exclusions, deductibles, and documentation requirements right away.
Should I Hire a Plumber Before Cleanup Begins?
Yes, you should call a plumber first; their inspection can confirm the break and stop further leaks. Then you can start cleanup. Acting quickly protects your space, and you’re not handling it alone.
Can I Stay in My Home During the Drying Process?
You can stay home if you’ve isolated the area, confirmed no electrical hazards, and maintain safe humidity. You’ll need strong ventilation, dehumidifiers, and frequent monitoring; otherwise, temporary relocation helps you protect health, comfort, and recovery.
What Signs Mean Hidden Water Damage Is Still Present?
Musty odors, warped floors, peeling paint, and recurring damp spots mean hidden water’s still there. For example, if your baseboard keeps swelling after drying, you likely need deeper inspection, moisture mapping, and targeted drying now.
How Long Does Burst Pipe Water Damage Restoration Usually Take?
You’ll usually need 3–7 days for drying and basic restoration, but severe damage can take weeks. You’ll speed things up by stopping the leak fast, removing water, drying thoroughly, and checking hidden moisture.
Summary
When a pipe bursts, quick action is your best shield. You’ve shut off the water and power, documented the damage, and started cleanup, which puts you on the right path. Keep watching for hidden moisture and mold, because water damage can spread like an unchecked spark. If the loss is extensive, bring in water damage pros. With fast response and a few preventive upgrades, you can protect your home and reduce the chance of another disaster.