
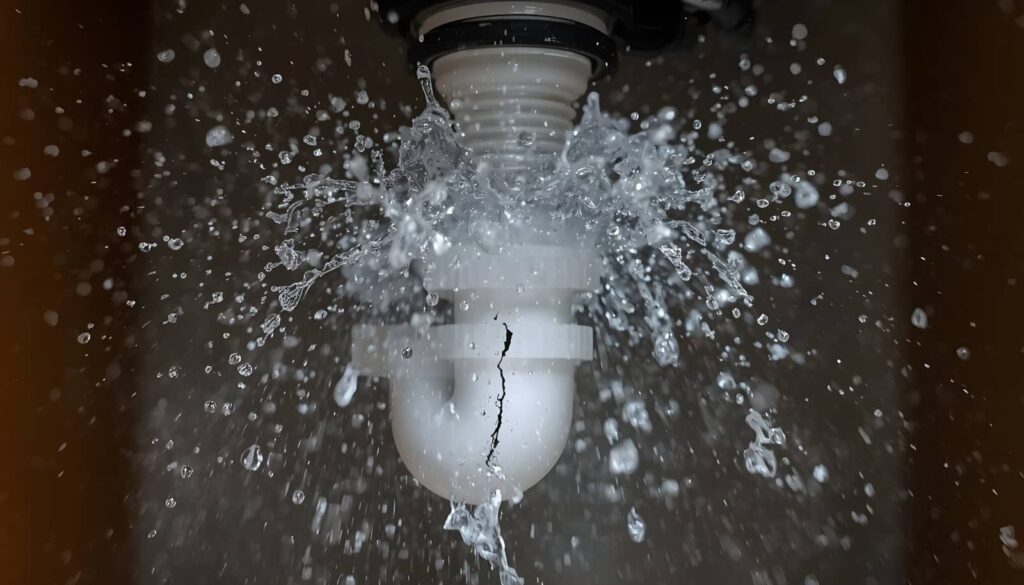
Many households in the U.S. face a water damage emergency each day, and a burst pipe can escalate fast. You need to shut off the water, cut power to affected areas, and move valuables immediately. Flood Damage Restoration professionals can then remove standing water, dry materials, and check for hidden moisture before mold starts. What happens next can determine whether you’re facing a quick repair or a major restoration.
Key Takeaways
- Shut off the main water valve immediately to stop flooding and reduce further pipe damage.
- Turn off electricity in affected areas if water reaches outlets, appliances, or wiring.
- Move valuables, open faucets, and document damage with photos for insurance records.
- Call emergency cleanup services to extract standing water, assess moisture, and deploy drying equipment.
- Contain water with towels or a wet-dry vac, then inspect for structural damage and plan repairs.
What To Do When a Pipe Bursts?
When a pipe bursts, act fast: shut off the main water supply, cut power to any affected areas if it’s safe, and move valuables away from the water.
Next, check nearby fixtures for continued flow and note where the leak started. Don’t touch wet electrical devices or standing water near outlets.
If you can, open faucets to drain remaining pressure and reduce dripping. Contain spread with towels, buckets, or plastic sheeting while you wait.
Then contact emergency burst pipe cleanup services so your home gets the right response without delay. You’re not dealing with this alone; quick, calm action helps protect flooring, walls, and stored items.
Keep clear access to the damaged area, and document visible damage for your records.
How Emergency Cleanup Services Help
Emergency cleanup services step in right away to limit water damage, remove standing water, and begin drying the affected area before moisture spreads into walls, floors, and insulation.
You get trained technicians who assess moisture, map affected zones, and use commercial extractors, air movers, and dehumidifiers to stabilize conditions fast.
They protect salvageable materials, remove damaged items, and document losses for your records.
They also monitor humidity and surface temperatures so hidden dampness doesn’t keep growing.
With this support, you’re not handling the disruption alone; you’re working with a team that knows how to restore order efficiently.
Their process reduces secondary damage, shortens downtime, and helps your space return to normal with less stress and fewer surprises.
Shut Off Water and Power Safely
Before cleanup begins, you should shut off the main water supply to stop the flow and reduce further flooding, then cut power to affected areas if water has reached outlets, appliances, or wiring.
Use the main valve, usually near the meter or where the line enters your home, and turn it clockwise until it stops. If you can’t reach it safely, ask a trained team member to help.
Next, switch off breakers for wet rooms, and never stand in water while touching electrical controls. This step protects your household and gives our cleanup crew a safer workspace.
Once utilities are isolated, you can focus on recovery with confidence, knowing you’ve taken the first critical action together.
Stop Water Damage Before It Spreads
Shut off the water supply at the main valve to stop the burst from feeding more water into your home.
Then contain the floodwater with towels, barriers, or a wet vacuum to keep it from spreading into adjacent rooms.
Quick containment reduces saturation, limits structural damage, and gives cleanup crews a safer starting point.
Shut Off Water Supply
Turn off the main water valve right away to stop more water from flooding your home and to limit damage to floors, walls, and belongings.
If you know where the valve is, rotate it clockwise until it stops. If it’s stuck, don’t force it; use the nearest accessible shutoff for the affected line instead.
In a house, the main valve is often near the water meter, basement wall, or utility room. In an apartment, check under sinks or contact building maintenance immediately.
After shutting it off, open a faucet to relieve pressure in the line. This step helps you regain control quickly and keeps your space safer until emergency burst pipe cleanup services arrive.
Your fast action protects your home and supports the team that’ll help you recover.
Contain Spreading Floodwater
Once the water is off, move quickly to contain the spread so moisture doesn’t keep traveling through your home.
You should place towels, mops, or absorbent barriers at the edge of the wet area to stop runoff. If you can, lift rugs, furniture pads, and boxes from the floor, then move valuables to a dry room.
Use a wet-dry vac to remove standing water, working from the outer edge inward. Close doors to limit airflow into unaffected rooms, but keep the damaged area accessible for cleanup.
If water reaches outlets or appliances, avoid contact and call a pro.
This fast containment helps your space stay safer, reduces secondary damage, and keeps you in control while your cleanup team takes over.
Remove Standing Water and Debris
After the pipe is contained, you need to remove standing water and debris fast to limit further damage.
Use a wet vac, pump, or extraction unit to clear pooled water from floors, corners, and low spots. Work methodically so you don’t miss hidden pockets under furniture or along baseboards.
Pick up sodden materials, broken drywall, insulation, and small debris as you go, placing them in heavy-duty bags for disposal. Keep pathways clear so your team can move safely and work efficiently.
If water contains mud or contaminants, wear gloves and boots. You’re not handling this alone; a coordinated cleanup helps your space feel controlled again.
The quicker you clear the area, the easier it’s to reduce hazards and prepare for the next recovery step.
Dry Out Walls, Floors, and Belongings
Set up drying equipment right away to pull moisture from walls, floors, and belongings before it spreads deeper into materials.
Place air movers to push dry air across damp surfaces, and run dehumidifiers to remove water vapor from the room.
Open cabinet doors, lift rugs, and separate furniture so air can circulate freely.
Remove wet fabrics, papers, and electronics from saturated areas, and dry them according to their material limits.
Keep HVAC off if it’s moving moisture around, and seal the space enough to keep drying efficient.
Check surfaces often so you can adjust airflow and placement as conditions change.
Fast, steady drying helps you protect your space, reduce repair time, and feel confident your home is getting back to normal.
Find Hidden Moisture and Mold Risks
Even while visible surfaces start to dry, hidden moisture can stay trapped behind walls, under flooring, and inside insulation. You need to check these concealed areas fast, because lingering dampness can feed mold within 24 to 48 hours.
Use a moisture meter, infrared camera, or professional inspection to trace cooler, wetter zones that normal drying misses. Pay close attention to baseboards, cabinet backs, subfloors, and wall cavities near the burst.
If you notice a musty odor, discoloration, or soft materials, treat those spots as active risks. When you catch moisture early, you protect your home and keep your household safe.
You’re not alone in this process; thorough detection helps your cleanup team focus on the right areas and restore confidence quickly.
Repair Damage After Cleanup
After cleanup, you should assess structural damage to confirm framing, subflooring, and drywall are still sound.
You’ll then repair or replace damaged fixtures and finishes, including insulation, flooring, trim, and wall surfaces. This restores the affected area to safe, functional condition and helps prevent lingering issues.
Assess Structural Damage
Once the water is removed, you should assess the structural damage right away to identify what needs repair and prevent hidden problems from worsening.
Check framing, subfloors, drywall, and load-bearing areas for swelling, cracking, sagging, or movement. Use a moisture meter to verify hidden saturation, especially near base plates and seams.
- Inspect visible joints and fasteners for warping or separation.
- Test floors and walls for soft spots, bounce, or flex.
- Mark damaged sections so your crew can plan targeted repairs.
You’re not alone in this step; a careful review helps your property recover safely and keeps your team aligned.
If you find severe deformation, call a qualified contractor or structural professional before reopening the area.
Restore Fixtures And Finishes
With the structure cleared for repair, you can start restoring fixtures and finishes so the space becomes safe and usable again.
Replace damaged drywall, baseboards, insulation, and trim only after moisture readings confirm dry framing. Reinstall cabinets, sinks, faucets, and light fixtures that passed inspection, and swap any corroded parts before they fail.
If flooring buckled, remove warped sections and fit new materials to match the existing subfloor and layout. Seal joints, patch surfaces, and sand repairs smoothly so paint and coatings bond well.
Then prime, repaint, and recaulk to protect repaired areas from lingering humidity.
You’re not doing this alone; a coordinated restoration team can help your home feel whole again and keep small defects from becoming new water problems.
Prevent Future Pipe Bursts and Leaks
To reduce the risk of future pipe bursts and leaks, you should inspect exposed plumbing regularly, insulate pipes in cold areas, and replace aging or corroded sections before they fail. You can also keep pressure steady and watch for slow drips, stains, or unexplained meter movement.
- Test shutoff valves and joints each season.
- Drain and winterize lines before freezing weather.
- Schedule professional plumbing checks after repairs or remodeling.
These steps help you protect your space and stay ahead of hidden damage. When you maintain your system, you join the homeowners who act early, avoid stress, and keep water where it belongs.
Frequently Asked Questions
How Quickly Can Emergency Cleanup Teams Arrive After a Burst Pipe?
You’ll usually get emergency cleanup teams in 30 to 90 minutes, depending on location and demand. They’ll mobilize fast, assess damage, and start water extraction right away to protect your property.
Does Homeowners Insurance Usually Cover Burst Pipe Cleanup Services?
Yes, you’re often covered if the burst was sudden and accidental, but not from neglect or gradual leaks. You should review your policy, document damage fast, and file a claim promptly to protect your coverage.
Can I Stay in My Home During Burst Pipe Cleanup?
You can stay home if the area’s safe; water-damage claims start with plumbing failures. You’ll need to avoid wet zones, keep power off, and let technicians dry and sanitize affected spaces.
What Equipment Do Professionals Use to Detect Hidden Water Damage?
You’ll see professionals use moisture meters, thermal cameras, hygrometers, and borescopes to find hidden water damage. They’ll trace damp areas quickly, explain findings clearly, and help you feel confident your home’s being properly protected.
How Long Does the Entire Burst Pipe Cleanup Process Usually Take?
Usually, you’ll need 1-3 days; minor jobs finish faster, while severe damage can take longer. Your crew works methodically—extracting, drying, and restoring—so you’re not left swimming in your own décor.
Recap
When a pipe bursts, you need to act fast to keep damage from snowballing. Shut off water, cut power to unsafe areas, and call emergency cleanup services right away. They’ll remove standing water, dry materials, and check for hidden moisture before mold takes hold. With quick response and proper repairs, you can get your property back on track and reduce future risk. In water emergencies, a stitch in time saves nine.