
When floodwater hits, everything can feel like it’s happening at once. You need to stop the source, secure the property, and protect what isn’t damaged yet. Flood Damage Restoration starts with shutting off water, securing openings, moving valuables, and marking contaminated areas before inspecting moisture and structural damage. That first sequence can determine how quickly recovery starts and what steps are needed to restore your property properly.
Key Takeaways
- The restoration team first assesses safety risks, identifies the water source, and documents affected areas with a quick walkthrough.
- They shut off the main water supply and secure the property by boarding openings and protecting unaffected areas.
- Crews move salvageable items, turn off HVAC in wet zones, and block water from spreading into clean spaces.
- Moisture is inspected with meters and thermal imaging, while standing water is extracted and drying equipment is started.
- Cleanup, sanitizing, and repairs begin after drying, including debris removal, disinfecting surfaces, and replacing damaged materials.
What Happens First After Flood Damage?
As soon as flood damage is reported, the restoration team arrives to assess the water source, stop further intrusion if possible, and identify immediate safety risks such as electrical hazards or structural instability.
You’ll usually get a quick walkthrough, where technicians document affected areas, moisture levels, and visible contamination. They then explain the plan so you know what’s happening and why.
With emergency flood damage restoration services, you’re not left guessing; the crew prioritizes safety, then maps the scope of damage.
Next, they set monitoring points and decide which materials need urgent attention. This first response helps you stay informed, reduce uncertainty, and feel supported while recovery begins.
From there, your team can move into mitigation steps that limit secondary damage and prepare your home for drying.
Secure the Property and Stop the Water
First, you’ll shut off the main water supply or isolate the leak to stop additional flooding at the source.
Next, you’ll board up broken windows, doors, or other openings to secure the property and limit further exposure.
Then, you’ll protect unaffected areas with barriers or coverings so water and debris don’t spread into clean spaces.
Stop The Water Source
Before cleanup can begin, stop the water at its source and secure the property to prevent further damage. You should locate the shutoff for the main supply, then close it fully.
If the water comes from a fixture, appliance, or pipe, isolate that branch if you can do so safely. You’ll want to cut power to wet areas only when it’s safe and dry enough to reach the breaker.
Next, verify that water has stopped flowing and check nearby rooms for hidden leaks. If the source is outside your control, call the utility or a licensed plumber right away.
Keep family members and pets away from saturated zones, and document what you see. Acting quickly helps your restoration team protect your home and get your recovery moving.
Board Up Openings
Once the water is under control, you should board up broken windows, damaged doors, and other exposed openings to secure the property and limit further intrusion.
Next, inspect each opening for loose glass, warped frames, and unstable trim. Remove hazards carefully, then measure the span so you can cut exterior-grade plywood to fit snugly.
Fasten the panels with corrosion-resistant screws or bolts into solid framing, not damaged sheathing. If a door can’t close and lock, reinforce it with a temporary cover and brace.
Check that each board overlaps the opening enough to resist wind and entry. This step helps you protect your site, maintain control, and move forward with your restoration team as a coordinated group.
Protect Unaffected Areas
Now that you’ve secured the openings, protect the unaffected areas by isolating them from standing water and contaminated runoff.
Move furniture, rugs, and electronics to dry rooms, then lay down plastic sheeting or impermeable barriers at doorways. You should shut off HVAC systems in wet zones so spores and odor don’t spread through shared ductwork.
Next, place sandbags, towels, or commercial dams along low thresholds to redirect water away from clean spaces. If you can safely reach it, close interior valves and stop active leaks at the source.
Mark contaminated areas clearly so your crew knows where not to walk. By taking these steps, you’re helping your home stay organized, safer, and ready for the next restoration phase together.
How Flood Damage Restoration Teams Inspect the Damage
You’ll start with an initial site assessment, where the team checks safety, documents affected areas, and identifies immediate hazards.
Next, they map the moisture source with meters, thermal imaging, and visual cues to trace how far the water has spread.
Then they review structural damage by examining framing, flooring, drywall, and other materials to determine what can be dried, cleaned, repaired, or removed.
Initial Site Assessment
When flood water hits, the restoration team arrives quickly and performs an initial site assessment to map the damage and set priorities.
You’ll see technicians document each affected room, note safety hazards, and verify which areas you can safely enter. They inspect walls, floors, ceilings, cabinetry, and contents for visible damage, then record structural concerns that could worsen conditions.
Next, they check electrical, HVAC, and plumbing components for immediate risk so they can protect your home and everyone inside. You’re kept informed at each step, because clear communication helps you feel supported and included.
The team then organizes findings into a response plan, so cleanup starts with the most urgent tasks. This focused first look gives your recovery the right direction from the start.
Moisture Source Mapping
The crew traces the moisture back to its source so they can stop active intrusion and target the right repairs. You’ll see them scan floors, walls, baseboards, and hidden cavities with moisture meters and thermal imaging, then compare readings to the wettest areas.
They mark every affected zone, note how far water has traveled, and separate fresh intrusion from lingering saturation. Next, they check plumbing lines, exterior openings, appliance leaks, and storm entry points to confirm where water entered.
As they map each source, you stay informed and included in every step, so you know what’s happening and why. This clear picture helps the team plan targeted extraction, drying, and containment, keeping your property’s recovery focused, efficient, and less overwhelming for everyone involved.
Structural Damage Review
After the moisture source is mapped, the crew reviews the structure for signs of flooding-related damage, checking whether the water has weakened framing, warped flooring, loosened drywall, or compromised ceilings.
You’ll see them move room by room, using meters, levels, and visual checks to confirm what’s safe and what needs repair.
- They test load-bearing areas first.
- They note swelling, sagging, and separation.
- They inspect subfloors and wall cavities.
- They mark any shifting or instability.
- They document findings for your plan.
This step helps you understand the full impact before work starts, and it gives your team a clear path forward.
You’re not left guessing; you’re included in the process, and each decision is based on the structure’s actual condition.
Remove Standing Water and Moisture
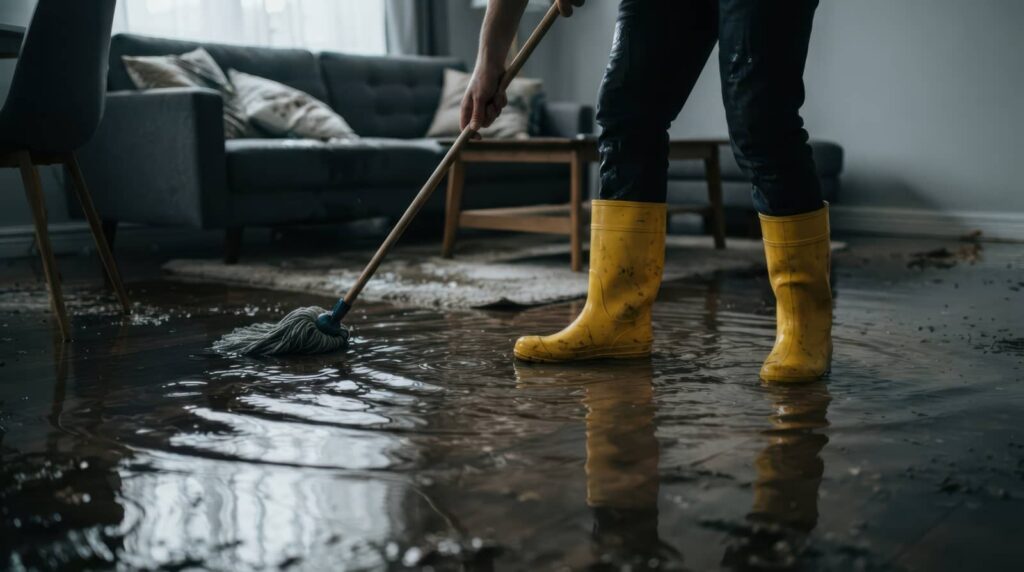
Standing water must come out fast to limit structural damage and stop mold from spreading. You’ll see the crew start with pumps, wet vacs, and extraction tools, working room by room so every pooled area gets cleared.
They’ll map the water’s path, check for trapped moisture at floor edges, and keep you informed so you know what’s happening at each step.
After bulk water’s gone, they’ll wipe surfaces, remove damp materials that can’t be saved, and use meters to confirm moisture levels are dropping.
This quick, methodical approach helps protect your home and keeps your recovery team moving together.
You’re not handling it alone; your restoration specialists will guide the process, reduce risk, and prepare the space for the next phase of cleanup.
Dry Out Walls, Floors, and Hidden Spaces
With the water removed, your crew shifts to controlled drying of walls, floors, and hidden spaces to stop lingering moisture from causing rot or mold. You’ll feel better knowing this step is methodical and measured.
We map damp areas, open pathways for airflow, and place drying equipment where it can reach trapped moisture.
- Monitor humidity and temperature
- Lift baseboards where needed
- Dry wall cavities and subfloors
- Circulate air through closets
- Check behind cabinets and trim
You stay informed as technicians track readings and adjust placement until materials stabilize. This process protects your home’s structure and helps your space feel safe again.
When drying is complete, you’ll be ready for the next restoration phase with confidence.
Start Cleanup, Sanitizing, and Repairs
Now cleanup can begin, and your team will remove debris, damaged materials, and contaminated contents so the site is safer to work in.
Next, you’ll sort salvageable items from items that can’t be restored, then bag, haul, and dispose of waste according to local rules.
Your crew will clean hard surfaces with approved detergents, then apply sanitizers to reduce bacteria, mold, and odor-causing residue.
After that, they’ll disinfect high-touch areas and verify that hidden pockets of moisture are gone.
Once the space is clean and dry, repairs can start: replacing drywall, insulation, trim, flooring, and any compromised fixtures.
You’re not handling this alone; you’ve got a structured process and a team focused on getting your property back to normal safely and efficiently.
Frequently Asked Questions
How Soon Can Emergency Flood Restoration Crews Arrive?
You’ll usually get emergency flood restoration crews in 1–4 hours, sometimes sooner. You call, they dispatch, you secure the area, and they arrive, assess water, stop damage, and start extraction fast.
Is It Safe to Stay in the Home After Flooding?
No, you shouldn’t stay—floodwater can hide electrical, structural, and contamination risks. You’ll leave immediately, shut off utilities if safe, document damage, and call restoration pros, because your safety starts before cleanup.
Will My Insurance Cover Emergency Flood Restoration Costs?
Usually, your insurance’ll cover emergency flood restoration if your policy includes flood damage. You’ll file a claim, document losses, and your insurer’ll review coverage. You’re not alone; restoration teams help you through each step.
How Long Does Flood Damage Restoration Usually Take?
Usually, you’re looking at three to ten days, though severe cases can stretch longer. You’ll see assessment, extraction, drying, cleaning, and repairs, each moving like a relay to get you safely back home.
What Belongings Can Be Saved After Water Damage?
You can often save furniture, documents, clothing, electronics, and sentimental items if you act quickly. You’ll sort, clean, dry, and disinfect them fast, then professionals can assess hidden damage and prioritize what’s truly salvageable.
Summary
When floodwater hits, you want the first steps to work like a steady hand on a stormy wheel. The team secures your property, stops the water, and checks every damaged area with careful precision. Then they remove standing water, dry hidden spaces, and begin cleanup. By following this clear sequence, you can turn chaos into order and protect your home from deeper damage, one controlled step at a time.