
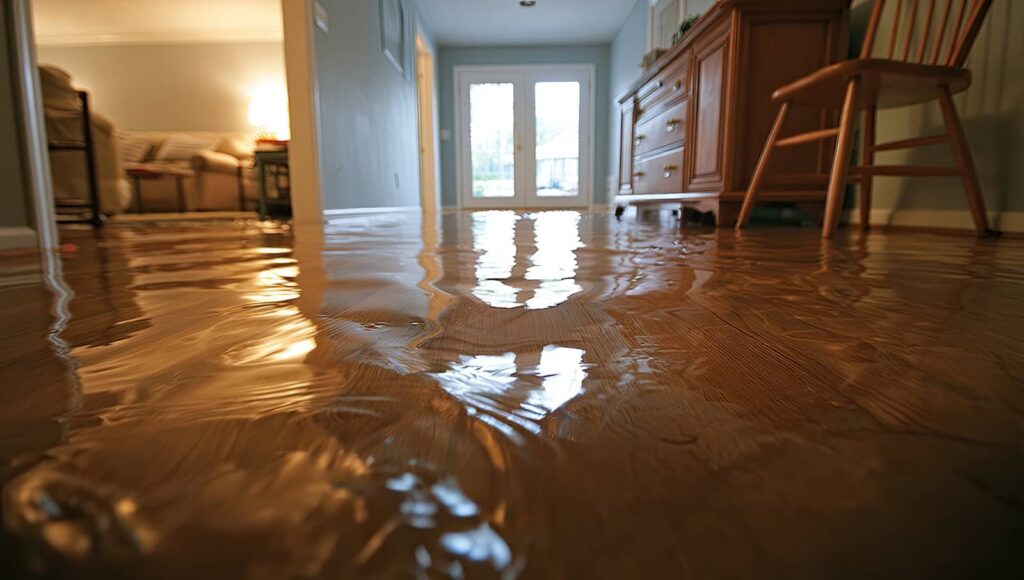
Like a storm leaving footprints through every room, flood damage can feel overwhelming, but you can take control fast. You’ll start by making the home safe, shutting off utilities, and stopping the water source if possible. Flood Damage Restoration professionals then remove standing water, dry hidden moisture, clean affected surfaces, and watch for mold. The next steps can protect your structure and your claim, and choosing the right restoration contractors will matter more than you might expect.
Key Takeaways
- Ensure safety first by shutting off electricity and gas, documenting damage, and marking unsafe areas before entering flooded spaces.
- Stop the water source and remove standing water quickly using pumps, vacuums, air movers, and dehumidifiers to limit further damage.
- Clean wet surfaces promptly, disinfect affected areas, and dry materials fast to reduce mold growth and contamination.
- Inspect structural damage carefully and replace compromised porous materials that stayed wet too long.
- Keep receipts, track progress, and communicate regularly with restoration professionals throughout the entire process.
What to Do Right After Flood Damage
As soon as flood damage occurs, you should prioritize safety and shut off electricity and gas only if you can do so without entering standing water.
Next, document visible damage with photos and short notes, then contact your insurer and a trusted restoration team. You belong in a process that protects your home, so keep children and pets away from affected rooms and wear gloves, boots, and a mask if you must enter.
Start removing wet rugs, paper, and loose items only if conditions are stable. These flooded home restoration process steps help limit secondary damage and support a faster recovery.
Ventilate the space when it’s safe, and avoid using compromised appliances, outlets, or HVAC systems until a professional evaluates them.
What Happens First After a Flood
First, you should confirm the area is safe by checking for electrical hazards, structural instability, and contaminated water before entering further.
Next, you’ll stop the water source if it’s still active and shut off utilities when needed to limit additional damage.
Then, you should document the affected areas with photos and notes so your restoration team can assess losses and plan cleanup accurately.
Safety Assessment
Before anyone starts cleanup, a professional performs a safety assessment to identify immediate hazards and decide whether the home is safe to enter.
You’ll see them check floors for collapse risk, examine ceilings for sagging, and look for electrical shock threats, broken glass, sharp debris, and contaminated materials. They wear protective gear and may limit access to specific rooms until conditions improve.
If they detect structural instability, they’ll mark unsafe areas and guide you on where you can stand without exposure. This step also helps your team choose the right equipment and protect your family from avoidable injury.
You’re not expected to judge every hazard yourself; the inspection gives you a clear, confident starting point so you can move forward with the restoration process together.
Water Source Control
Once the home passes the initial safety check, professionals move quickly to stop the water at its source so the damage doesn’t spread further.
You’ll usually see them shut off the main supply, isolate broken lines, and disable affected appliances or fixtures. If the leak comes from a burst pipe, they clamp, cap, or reroute flow to protect intact areas.
For storm or sewage intrusion, they block incoming water and seal openings when possible. This step matters because every minute of uncontrolled flow raises moisture levels in walls, flooring, and framing.
Damage Documentation
With the water source under control, professionals document the damage right away so nothing gets overlooked or disputed later. You’ll see them photograph every affected room, note moisture levels, and map where water traveled through flooring, walls, and contents.
They record serial numbers, item conditions, and structural concerns, creating a clear baseline for insurance and repair planning. This step protects you because it supports claims, guides drying priorities, and helps your team stay aligned on next actions.
If you’re overwhelmed, that’s normal; your crew works methodically so you don’t have to track every detail alone. Accurate documentation also helps us identify hidden risks, like saturated insulation or compromised electrical areas, before cleanup begins and your home moves toward recovery with confidence.
Water Removal and Drying in Your Home
Professional crews start water removal immediately to limit further damage and reduce the risk of mold growth.
You’ll see submersible pumps, wet vacuums, and extraction tools pull standing water from floors, carpet, and hidden cavities.
After bulk water is gone, technicians place high-velocity air movers and industrial dehumidifiers to drive moisture out of materials and indoor air.
They monitor humidity, temperature, and moisture content in framing, drywall, and subfloors, adjusting equipment until readings drop to safe levels.
You stay informed at each step, so you know what’s happening in your home and why it matters.
This controlled drying process helps stabilize your space, protects structural components, and prepares your property for the next phase of restoration with confidence.
Cleaning and Mold Prevention After Flooding
You’ll need to clean all wet surfaces quickly with approved disinfectants and remove porous materials that can’t be fully sanitized.
Use rapid drying methods like high-velocity air movers, dehumidifiers, and targeted ventilation to drop moisture levels fast.
This approach helps prevent mold growth by limiting the time surfaces stay damp and by eliminating hidden moisture before spores can colonize.
Rapid Drying Methods
Rapid drying starts as soon as standing water is removed, because moisture left in walls, flooring, and insulation can trigger mold within 24 to 48 hours.
You’ll move air fast with high-velocity fans, low-grain dehumidifiers, and, when needed, controlled heat to pull vapor from hidden cavities.
You should lift baseboards, drill drying ports, and open wall spaces so air reaches trapped moisture.
Moisture meters and thermal imaging let you track progress and confirm materials are returning to safe levels.
If hardwood, drywall, or carpet padding stayed wet too long, you may need targeted removal to speed drying.
You’re not handling this alone; a trained restoration team will coordinate equipment placement, monitor conditions, and adjust the plan so your home dries evenly and efficiently.
Mold Growth Prevention
Once surfaces are dry enough to clean, the focus shifts to stopping mold before it starts, because even small amounts of remaining moisture and organic debris can support growth.
You should remove porous items that stayed wet too long, then scrub hard surfaces with detergent and clean water. Use EPA-registered antimicrobial products only as directed, and keep windows open or fans running to maintain airflow.
Check behind baseboards, under cabinets, and inside wall cavities for hidden dampness. If materials still smell musty or feel cool, keep drying them.
Wear gloves, eye protection, and an N95 respirator when disturbing contaminated areas.
Home Repairs and Structural Fixes
After the water is removed and the structure is dry, professionals assess the home for damage to framing, drywall, flooring, insulation, and load-bearing components.
You’ll often need to replace swollen drywall, warped subflooring, and saturated insulation before any finish work begins. If framing members have bent, split, or softened, they get reinforced or swapped out to restore strength.
Structural repairs may include sistering joists, securing fasteners, and leveling affected areas so your home feels solid again.
Electrical outlets, baseboards, trim, and cabinets in wet zones may also need removal and reset.
Each fix aims to return stability, safety, and comfort, so you can move back into a space that’s sound, dry, and built to last.
How to Work With Restoration Pros
When you work with restoration professionals, start by giving them a clear picture of the damage, including visible water lines, affected rooms, odors, and any signs of structural distress.
Share when the flooding started, what caused it, and whether utilities were shut off. Ask for a moisture map, drying plan, and timeline so you know what each crew member will do.
Stay available for questions, but let the pros handle demolition, sanitation, dehumidification, and repairs. You’ll get better results if you document belongings, save receipts, and review each estimate before work begins.
Check progress daily, note changes, and speak up if something seems off. When you stay informed and involved, you become part of a capable team focused on getting your home safe again.
Frequently Asked Questions
How Long Does Flood Insurance Claim Processing Usually Take?
You’ll usually see flood insurance claim processing take 30 to 90 days, depending on damage scope, documentation, and adjuster availability. You can speed it up by filing promptly, organizing photos, receipts, and repair estimates.
Can I Stay in My Home During Restoration?
You can stay if your home’s structure, air quality, and utilities are safe, but you’ll likely need to relocate during demolition, drying, or mold treatment. A technician can tell you what’s practical.
What Documents Should I Photograph After Flooding?
Photograph your policy, deed, mortgage papers, receipts, appliance manuals, and any cleanup estimates. You’ll want wide shots, close-ups, and serial numbers. This helps you prove losses, speed claims, and feel less alone.
How Do Restoration Costs Get Estimated?
You’ll get an estimate after you document damage, measure affected areas, test moisture, and list needed repairs. Pros then price labor, materials, equipment, and disposal, so you can understand costs and feel included in decisions.
Are Personal Belongings Ever Fully Salvageable?
Sometimes, yes—you can fully salvage belongings if you act fast, dry them properly, and avoid contamination. You’ll need professional cleaning for porous items, electronics, and documents, but prompt assessment greatly improves recovery chances.
Wrap-Up
Flood recovery can feel overwhelming, but you can move through it step by step. Once you secure the home, stop the water source, and let pros remove moisture, the rest becomes more manageable. Even if the damage looks severe, timely drying, cleaning, mold control, and structural repairs can still protect your property. Stay in close contact with your restoration team, document every expense, and you’ll keep the process organized, safe, and on track.