
Do air movers and dehumidifiers really dry a water-damaged space faster than heat alone? You’ll see that the answer depends on how quickly you extract standing water, place drying equipment, and track moisture in hidden materials. If you set up the wrong tools or skip material removal, you can trap water and invite mold. The next steps show how to choose equipment, position it, and verify that the structure is actually drying.
Key Takeaways
- Use wet/dry vacuums, submersible pumps, or utility pumps based on water depth, surface type, and access.
- Inspect cords, hoses, and drainage paths before starting any extraction equipment.
- After water removal, use dehumidifiers, air movers, and HEPA air scrubbers to speed drying and improve air quality.
- Use moisture meters and thermal imaging to find hidden water in walls, floors, and insulation.
- Remove unsalvageable materials quickly, clean hard surfaces, and keep humidity below 60% to prevent mold growth.
What Water Mitigation Equipment to Use First
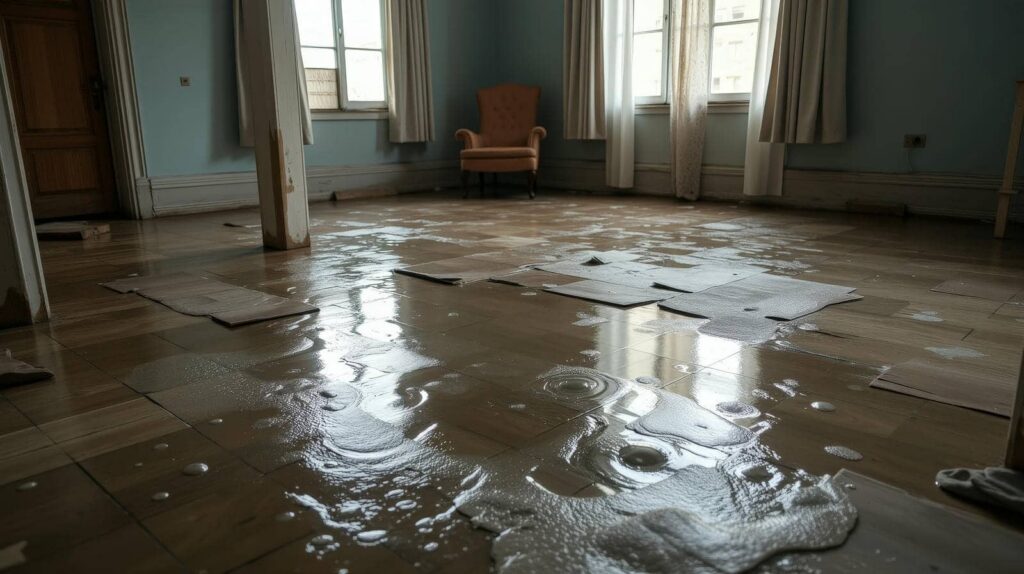
Start with the equipment that stops the water from spreading and speeds up extraction: a wet/dry vacuum for small areas, a submersible pump for standing water, and a utility pump when you need to move larger volumes quickly.
You’ll pick the tool based on depth, surface type, and access, so your water mitigation equipment works efficiently.
Use air movers after extraction to push moisture from carpets, baseboards, and subfloor edges, then add dehumidifiers to lower humidity and support drying methods.
If you’re working with the team, check cords, hoses, and drainage paths before you switch on anything.
Keep traffic off saturated materials, document moisture levels, and adjust placement as conditions change.
When you choose first-rate gear, you protect the space and help everyone recover faster.
What Water Mitigation Equipment Does After a Leak
After you’ve pulled standing water and stopped further spread, water mitigation equipment shifts from removal to stabilization and drying.
You position dehumidifiers to lower humidity, protect structural materials, and slow secondary damage.
Moisture meters and thermal imaging help you verify where water remains in drywall, trim, subfloor, and insulation, so you can target hidden pockets before mold starts.
HEPA air scrubbers improve indoor air quality by capturing fine debris and musty particles while the space dries.
If cabinets, baseboards, or flooring stay saturated, you remove or open them to expose wet cavities.
Then you monitor readings daily and adjust equipment until materials reach acceptable moisture levels.
This process helps you work like a confident restoration team, keeping your home safer and more stable.
How Air Movers Speed Up Drying
Air movers speed drying by creating continuous airflow across wet surfaces, which helps moisture evaporate faster from drywall, flooring, carpet, and framing.
You place them low and aim them to sweep moisture off the material, not just blast the room. This keeps the boundary layer thin and moves damp air away from the surface.
Position units 6–12 inches from walls
Angle airflow across, not into, materials
Overlap coverage in larger rooms
Raise carpet edges when needed
Check for even movement around furniture
When you set them correctly, you help the whole affected area dry more uniformly.
That means fewer damp pockets, less lingering odor, and a faster return to normal. You’re not guessing—you’re guiding air where your team needs it.
Why Dehumidifiers Matter
You use dehumidifiers to remove airborne moisture quickly, which lowers relative humidity and helps dried materials release trapped water faster.
By controlling moisture levels, you reduce the risk of secondary damage such as mold growth, corrosion, and material swelling.
They also support structural drying by keeping walls, subfloors, and other assemblies in a drier environment so your air movers can work more effectively.
Humidity Removal Speed
Fast humidity removal is critical after water damage because lingering moisture keeps materials wet, slows drying, and increases the risk of mold and structural deterioration.
You need dehumidifiers to pull vapor from the air faster than surfaces can re-evaporate it, so your drying plan stays ahead of the problem. When you control humidity quickly, you create better conditions for restoring your space with confidence.
Measure relative humidity often
Match dehumidifier size to room load
Keep doors and windows closed
Run air movers with dehumidifiers
Empty or drain units consistently
You’ll get faster, more even drying when equipment works as a team. In a proper setup, you belong to the group that treats moisture control as a measurable process, not guesswork.
Preventing Secondary Damage
When moisture lingers after a leak or flood, dehumidifiers protect materials from secondary damage by lowering indoor humidity before wood, drywall, insulation, and finishes can absorb more water.
You limit swelling, cupping, peeling, and adhesive failure by keeping the air drier than the wet materials. Place the unit in the affected zone, close openings, and run it continuously so it pulls vapor from the air instead of letting it settle on cool surfaces.
Empty or drain it as needed, and check the target range with a hygrometer. This steady control helps you stay ahead of mold-friendly conditions and preserves the finish quality your space deserves.
Supporting Structural Drying
Dehumidifiers matter in structural drying because they remove moisture from the air before wet framing, drywall, subfloors, and insulation can keep reabsorbing it. You speed evaporation, protect materials, and help your drying plan stay on track. Set equipment to create balanced airflow and steady humidity control.
Place dehumidifiers in the most humid zones.
Close the building envelope to keep conditions stable.
Monitor relative humidity and grain depression daily.
Pair dehumidifiers with air movers for faster drying.
Adjust placement as materials reach target moisture levels.
When you check readings, you’ll know which areas still need attention, and you’ll work like part of a trained mitigation crew.
That kind of control reduces warping, swelling, and mold risk while keeping your project moving forward.
How Moisture Meters Find Hidden Water
You use moisture meters to pinpoint hidden water behind walls, under flooring, and inside materials before damage spreads.
Pin-type meters measure resistance with probes, while pinless meters scan surfaces without puncturing them, so you can match the tool to the material and access point.
Pinpointing Hidden Moisture
How do technicians find water that’s hidden inside walls, under flooring, or within insulation? You use a moisture meter to compare suspect areas with dry reference points, so you can map abnormal readings fast. The instrument sends a small signal into the material and reports how much resistance or energy loss it detects, which changes when water’s present.
Mark each reading location carefully.
Test adjacent dry areas first.
Scan slowly for rising values.
Recheck after drying starts.
Record data to guide crew members.
When you trace these patterns, you spot the wet zone’s edges and reduce guesswork. That helps your team work together, target drying equipment, and protect the structure with confidence.
Meter Types and Uses
Pinpointing hidden moisture starts with choosing the right meter for the material you’re testing. You’ll usually use a pin meter for direct resistance readings in wood, drywall, and other porous materials. Press the probes in firmly, then compare readings across a wet area and a known dry area.
Use a pinless meter when you need faster, noninvasive scanning over larger surfaces; it helps you map moisture without making holes. For deeper confirmation, pair your meter with thermal imaging and inspect temperature anomalies.
Always calibrate before use, check battery strength, and follow the manufacturer’s scale for the material type. When you read patterns, not just numbers, you’ll work like a trained crew member and locate trapped water before it spreads.
How to Dry Floors and Walls
Start by removing standing water and opening up the affected area so air can move freely across floors and walls. You’ll dry surfaces faster when you create a controlled path for air, heat, and dehumidification.
Position air movers low for floors and angle them along walls to sweep moisture away. Run dehumidifiers in the same space so released vapor gets captured before it settles again.
Keep doors and vents set for steady circulation.
Move rugs and loose items out of the way.
Check baseboards, corners, and under furniture.
Reposition equipment as surfaces begin to dry.
Monitor readings so you know the drying plan’s working.
Stay consistent, and you’ll help your crew or household recover with confidence.
When to Remove Wet Materials
You should assess each wet material for the depth and duration of saturation before you decide on removal.
Separate salvageable components from unsalvageable ones by checking structural integrity, visible deformation, and remaining moisture content.
Remove porous, deteriorated items like insulation, carpet pad, and soaked drywall when they can’t dry quickly or safely.
Assess Material Saturation
Assess material saturation by checking how deeply water has penetrated each component, because the decision to dry or remove a material depends on its porosity, structural condition, and contamination risk.
You’ll belong to a more effective response team when you measure wetting accurately and act fast. Use a moisture meter, lift edges, and inspect hidden cavities. Then compare readings across the room so you can spot uneven intrusion.
Test drywall near baseboards
Probe insulation behind trim
Check carpet, pad, and subfloor
Inspect wood for swelling
Note odors, staining, and softness
If moisture stays elevated after surface drying, keep monitoring until readings level out.
When saturation is deep, the material can hold water that slows drying and spreads damage to adjacent areas.
Salvageable Versus Unsalvageable
When materials stay wet too long, decide quickly whether they can be dried in place or need removal, because salvageability depends on porosity, structural stability, contamination, and the amount of time saturation has persisted.
You can usually keep dense, intact materials that haven’t warped, delaminated, or softened, if you can dry them before secondary damage starts.
You should remove items that’ve lost integrity, support mold growth, or trap moisture behind sealed surfaces.
Check for odors, staining, and surface breakdown, then verify that drying equipment can reach the affected core.
If you’re unsure, document the condition, isolate the area, and treat the material as suspect until a qualified technician confirms it’s stable.
Your team works faster when everyone uses the same decision criteria.
Remove Porous Deteriorated Items
Porous materials that have deteriorated from prolonged saturation usually need removal because they hold water deep in their structure, dry slowly, and quickly become a mold and odor source. You should pull them when you see swelling, delamination, crumbling, or persistent dark staining. This helps your drying crew protect the rest of the structure and keep the job on track.
Cut out the soaked carpet pad
Remove warped drywall below the flood line
Dispose of saturated insulation
Extract particleboard that’s softened
Bag contaminated fabrics and papers
Use PPE, isolate the area, and run dehumidifiers after removal.
How to Prevent Mold Growth
To prevent mold growth after water damage, you need to remove moisture quickly and keep the affected area dry throughout the mitigation process.
Inspect hidden spaces, such as wall cavities, baseboards, and under flooring, because trapped dampness lets spores colonize fast. Clean hard surfaces with an appropriate antimicrobial solution, then wipe away residue so nothing feeds growth.
Inspect hidden spaces for trapped dampness, and clean hard surfaces with antimicrobial solution to stop growth quickly.
Maintain indoor humidity below 60% by closing the space and limiting unnecessary traffic that adds moisture. Replace wet insulation, drywall, and carpet pad if they can’t dry promptly.
Check materials daily for musty odors, discoloration, or softening. You’re protecting your crew and clients when you document conditions, isolate contaminated areas, and act on any signs of persistent dampness before mold spreads.
How to Set Up Drying Equipment
Set the drying plan by matching equipment to the affected materials and the size of the wet area. You’ll create a tighter setup when you place air movers to push air across floors, walls, and cavities, and use dehumidifiers to pull moisture from the air.
Keep pathways clear so airflow isn’t blocked.
Lift furniture on blocks to expose damp surfaces.
Close doors or use barriers to contain drying zones.
Run cords safely and avoid overloaded outlets.
Position units with space around intake and exhaust.
Seal ducts or vents only when the setup requires it.
You’re not alone in this process; follow the layout, protect untouched areas, and make sure each unit serves a defined section of the room.
How to Monitor Drying Progress
Check drying progress regularly so you can verify that moisture levels are dropping and adjust equipment as needed.
You should take moisture meter readings in affected materials at consistent intervals, then compare them with baseline values from adjacent dry areas.
Log temperature, relative humidity, and dew point each visit, because these numbers show whether your dehumidifiers and air movers are working together.
Inspect walls, flooring, and structural cavities for cool spots, visible condensation, or lingering odor.
If readings stall, increase airflow, raise extraction capacity, or reposition equipment to reach hidden pockets.
You’ll stay aligned with your team when you document every check, note trends, and confirm when materials return to acceptable dry standards.
Frequently Asked Questions
How Long Does Water Mitigation Usually Take?
You’ll usually need 3–5 days for mitigation, but severe flooding can take a week or more. You should start extraction quickly, run drying equipment continuously, and monitor moisture daily to protect your property.
Can I Use Household Fans Instead of Air Movers?
No, you shouldn’t rely on household fans alone. You’ll move some air, but air movers deliver higher velocity and focused drying, so you’ll reduce moisture faster, limit hidden damage, and stay aligned with professional restoration standards.
Is It Safe to Stay in the Building During Drying?
Usually, you can stay if the structure’s stable and equipment’s running properly. You should avoid wet areas, monitor humidity, and keep children, pets, and sensitive occupants out if mold, contamination, or electrical hazards exist.
Will Drying Equipment Increase My Electricity Bill?
Yes, your bill will rise, but only like a brief storm. You’ll run dehumidifiers and air movers, and they draw power continuously. You can monitor usage, balance drying speed, and minimize costs with efficient placement.
When Should Professionals Handle Water Damage Cleanup?
You should call professionals when water covers large areas, reaches walls or subfloors, involves sewage, or persists over 24 hours. They’ll assess hidden moisture, prevent mold, and use industrial drying equipment safely.
Conclusion
In short, you don’t “wait and see” after a leak—you deploy the right mitigation gear, measure what the eye can’t, and dry the structure like you mean it. Use pumps and vacuums first, then air movers and dehumidifiers to bully moisture out of the building. If materials stay saturated, remove them. Monitor daily, because dampness loves drama, and mold loves dampness. Your job is simple: extract, dry, verify, and prevent a comeback.