

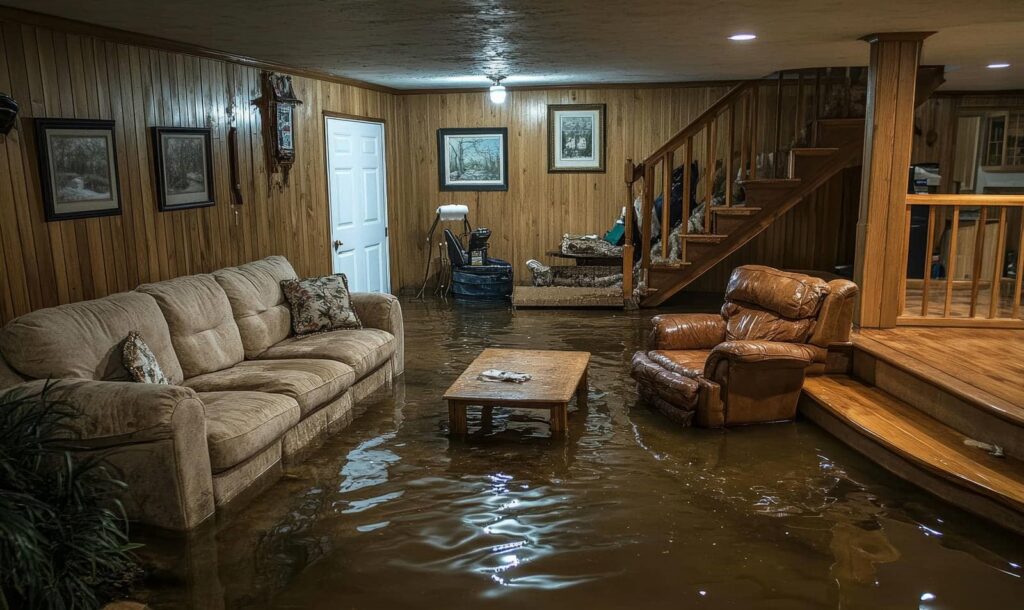
In the first 60 minutes, hidden moisture starts wicking into framing, insulation, and subfloors faster than you’d expect. You need to stop the source, document the damage, and remove standing water before it spreads deeper. Then you’ll dry concealed spaces, limit mold risk, and restore surfaces in the right order so the structure stays sound. What you do next in the water damage cleanup can decide whether the job stays manageable or turns into a full rebuild.
Key Takeaways
- Document damage quickly, shut off the water source, and make the area safe by turning off affected power.
- Remove standing water, salvage movable items, and discard saturated porous materials like carpet padding and insulation.
- Dry the space thoroughly with air movers and dehumidifiers, while monitoring moisture levels to prevent mold growth.
- Replace damaged drywall, insulation, and other compromised materials, following code requirements for wiring and plumbing repairs.
- Seal stains, finish repaired surfaces carefully, and perform a final inspection to ensure quality and detect hidden moisture issues.
Act Fast in the First 60 Minutes
In the first 60 minutes after water damage, every minute counts because moisture spreads quickly into flooring, drywall, insulation, and structural materials.
You need to document the affected areas, then begin water damage cleanup with controlled extraction and targeted drying. Act quickly to remove soaked contents that can be safely moved, and separate wet materials from dry ones to limit capillary action and hidden saturation.
Use fans and dehumidifiers only after you’ve confirmed the space can support them without worsening damage.
You’re not alone in this process; a disciplined response gives you the best chance of limiting structural loss and microbial growth.
Professional assessment can verify moisture levels, identify trapped water, and guide restoration decisions with precision.
Stop the Water and Make the Area Safe
Once you’ve documented the damage and started a rapid response, the next priority is to stop the water source and secure the area. You should shut off the main supply valve, close fixture valves, and isolate any leaking appliance or line if you can do so safely.
If water is coming from a ceiling, wall, or unknown source, contact building maintenance or an emergency plumber right away.
Next, turn off power to affected circuits only when you can reach the panel without entering standing water.
Keep everyone out of unstable rooms, and post a simple warning if others share the space. Move pets and family members to a dry zone, and keep doors open for safe access.
These steps help your team stay protected and prepare for cleanup together.
Remove Standing Water and Damaged Materials
With the area secured, you can begin removing standing water and any materials that can’t be saved. Use a pump, wet vac, or mop to clear the water quickly and keep the loss from spreading. Work methodically so you stay in control and feel confident in each step.
Clear standing water quickly, remove unsalvageable materials, and keep the loss contained with steady, methodical action.
Extract pooled water from low spots first.
Remove soaked carpet, padding, and insulation.
Bag porous debris to prevent cross-contamination.
Separate salvageable items for cleaning and drying.
You’re protecting your property and helping your team move faster. Place damaged materials in marked piles so disposal stays organized.
If drywall, baseboards, or ceiling tiles show saturation, cut them out cleanly at the edges of damage. Stay consistent, document what you remove, and maintain a clear path for the next phase of recovery.
Dry Walls, Floors, and Hidden Spaces
After you’ve removed standing water and unsalvageable materials, focus on drying the remaining structure and any concealed cavities.
Position air movers to create crossflow across wall bases, trim, and flooring, and pair them with dehumidifiers to pull moisture from the air.
Open access points at baseboards, toe kicks, or small inspection holes so you can move air through wall and floor assemblies.
Check carpet pad, subfloor, and framing with a moisture meter, then keep drying until readings stabilize near normal.
Lift insulation if it’s wet, and dry joist bays, chase walls, and cabinet voids with directed airflow.
You’re not doing this alone; a coordinated drying setup helps your space recover cleanly, safely, and with confidence.
Prevent Mold During Water Damage Cleanup
To prevent mold during water damage cleanup, you need to dry out materials fast using high airflow, dehumidification, and continuous monitoring.
You should also remove every moisture source, including standing water, wet insulation, and any active leaks, so damp conditions don’t persist.
When you act quickly and control humidity, you greatly reduce the risk of mold growth and secondary damage.
Dry Out Materials Fast
Dry out wet materials immediately to slow mold growth and limit structural damage. You’ll protect your space by moving air across damp surfaces, lifting soaked items off floors, and separating layers so hidden moisture can escape. Aim for controlled drying, not heat that warps finishes.
Set fans to sweep air across walls, trim, and furniture.
Open cavity access points so trapped moisture can vent.
Use dehumidification to pull water vapor from the room.
Check materials daily for shrinking damp spots and stable moisture readings.
When you act quickly, you join the homeowners who recover cleanly and confidently.
Drying fast reduces odor, limits staining, and helps you keep salvageable materials in service.
Remove Moisture Sources
Once you’ve started drying materials, you need to stop the water at its source so mold can’t keep feeding on hidden moisture. You should shut off the main supply, isolate leaking lines, and inspect appliances, roofs, windows, and HVAC condensate drains.
If a pipe burst or fixture keeps dripping, replace failed fittings or call a licensed plumber quickly. Remove standing water from trays, basements, and crawl spaces, then check for seepage behind walls and under cabinets.
You’ll protect your home by sealing active entry points and verifying humidity stays below 60%. Use dehumidifiers, exhaust fans, and proper ventilation to keep surfaces dry.
When you address the source now, you’re joining a proactive recovery team that limits damage, reduces odors, and helps everyone in your space stay safe.
Repair and Restore Damaged Areas
You should first assess structural damage to confirm that framing, subfloors, and load-bearing elements remain sound.
Next, replace compromised materials such as wet drywall, insulation, and warped trim so the area can dry and stabilize properly.
After repairs, you can refinish restored surfaces to match the surrounding space and return the property to service.
Assess Structural Damage
After the area is safe, inspect walls, floors, ceilings, and framing for warping, cracks, sagging, and soft spots that signal hidden structural damage. You’ll use a flashlight, a level, and gentle pressure to map changes without forcing anything. Trust your observations; you’re protecting your home and everyone who lives in it.
Trace each wall for bowing or separation at seams.
Check floors for bounce, dip, or uneven joists.
Look overhead for stains, sagging drywall, or shifted trusses.
Verify doors and windows still open and close smoothly.
If anything feels unstable, mark it and keep the space limited until a qualified professional evaluates it.
Careful assessment helps your recovery team plan precise repairs and brings your property back to a safe, steady condition.
Replace Compromised Materials
With structural hazards mapped, the next step is to remove and replace materials that can’t be safely dried or restored. You’ll target saturated drywall, swollen trim, delaminated subflooring, and insulation that has lost its thermal value.
Your team should cut back contaminated sections to clean, sound edges, then verify framing, sheathing, and fasteners are dry before closing walls. You’ll document every removed component, match replacement materials to the original assembly, and maintain code-compliant clearances around wiring, plumbing, and HVAC.
This controlled rebuild helps your property regain strength without trapping hidden moisture. When you work methodically, you stay aligned with trusted professionals and protect the home you belong in.
Careful replacement reduces odors, limits microbial growth, and creates a stable base for the final restoration steps.
Refinish Restored Surfaces
Now that damaged materials are replaced and the structure is dry, you can refinish the restored surfaces to bring the space back to a clean, usable condition.
You’ll want to sand, seal, patch, and repaint or recoat in sequence so each layer bonds properly and matches surrounding areas. This helps you regain a space that feels like yours again.
Feather repaired seams until they’re smooth.
Apply primer or sealant to block stains.
Match paint, stain, or finish with care.
Inspect edges, joints, and connections for uniformity.
You can also verify moisture levels before closing surfaces, because trapped dampness can compromise adhesion.
When you finish with precision, the room looks cohesive, performs well, and supports your return with confidence.
Frequently Asked Questions
How Do I Know if Hidden Water Damage Is Still Present?
You’ll know hidden water damage’s still present when you smell musty odors, see discoloration, feel damp surfaces, or detect warped materials. Use a moisture meter and thermal imaging; you’re not guessing—you’re verifying.
Can Water Damage Affect Electrical Systems After Cleanup?
Yes, water damage can still affect your electrical systems after cleanup. You should have a licensed electrician inspect wiring, outlets, and panels, because hidden corrosion, moisture, or debris can cause shorts, shocks, or failures later.
How Long Does Insurance Usually Take to Process Claims?
Insurance usually takes 7–30 days, though complex claims can stretch longer. You’ll speed things up by submitting photos, receipts, and reports quickly; think of your claim like a relay baton—clear handoffs keep recovery moving.
Should I Test Water for Contaminants Before Cleanup?
Yes, you should test the water first if you suspect sewage, chemicals, or floodwater contamination. You’ll protect your health, choose proper PPE, and avoid spreading hazards. Clean water from a burst pipe still needs careful inspection.
When Is Professional Remediation Necessary Instead of DIY?
You need professional remediation when damage is extensive, sewage or contaminated water’s involved, hidden moisture persists, mold starts, or structural materials are affected; you’ll protect your home, health, and peace of mind faster.
Conclusion
You can recover from water damage faster when you act immediately, shut off the source, and remove water before it spreads. Dry walls, floors, and hidden spaces thoroughly, then prevent mold with careful monitoring and proper airflow. Repair damaged materials only after everything is fully dry. When you follow each step, your property can rebound like a ship righted after a storm, steady, safe, and ready for normal use again.